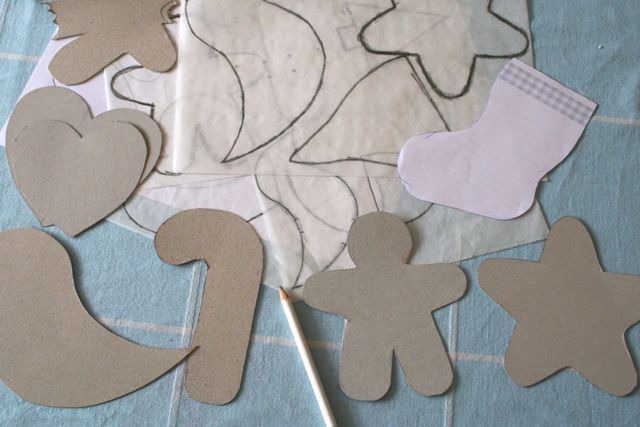
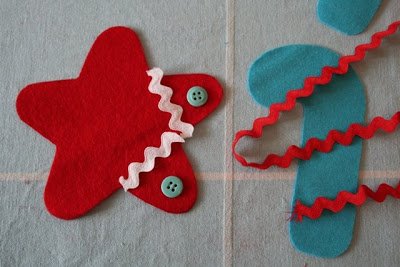
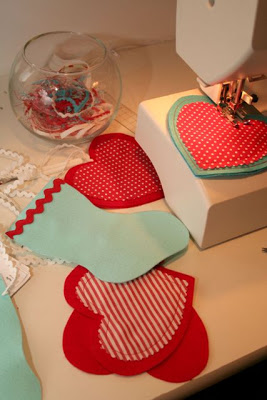
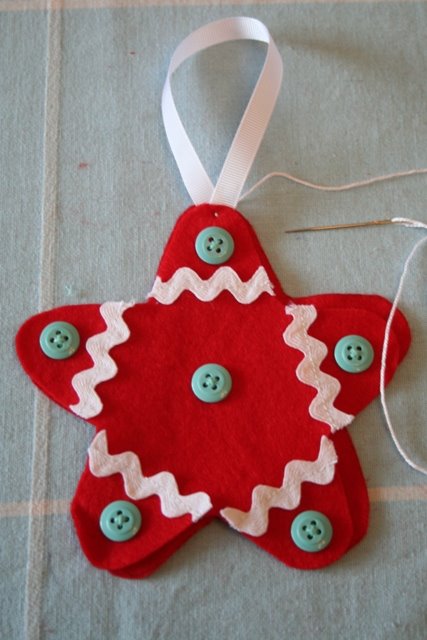
Sunday Stash :: #4

Estas são as minhas escolhas para o Sunday Stash de hoje: tecidos em verde e cor-de-rosa, para arejar de tanto encarnado que tenho tido nas minhas mãos nos últimos tempos. Aqui e aqui estão as indicações dos fabricantes dos tecidos.
These are my choices for today’s Sunday Stash: green and pink prints to ease all the red I’ve been handling in the last few days. Here and here are the manufacturers’ details.

Parede em crescimento / Growing wall

Alguém se lembra da minha “parede Etsy”? Apesar de aí haver quadros de outras proveniências, é assim que continuo a chamar à parede de que mais gosto em minha casa. Adoro ir comprando pequenos quadros de vez em quando e ter sempre sítio para os pendurar, assim como gosto do desalinhamento das gravuras, tornado coerente graças às molduras Ribba em branco do IKEA.
Does anyone remember my ‘Etsy wall’? Although there are prints from elsewhere, that’s how I still call my home’s favourite wall. I love buying small prints from time to time and always having a spot to hang them, and I like its random look, that is made coherent by IKEA’s white Ribba frames.


Estas são as minhas duas novas gravuras: a da esquerda chama-se Plant a Tree e foi comprada aqui e a da direita dá pelo nome de With Needle and Thread e vem daqui.

These are my two new prints: on the left you see Plant a Tree (bought here) and on the right there’s With Needle and Thread (bought here).

How to Make Christmas Ornaments

Why buy Christmas ornaments that look handmade when you can actually make them so easily? Sharon from The Key Bunch requested me for instructions on making Christmas ornaments so I’ve tried to document all the steps you need to take when making your personalised ornaments. So, this is not really a tutorial, but rather a bunch of suggestions written in an orderly manner. Shall we get to it?

1- First of all, you may want to look at some books, magazines, blogs and flickr photos for inspiration. Decide on shapes and look for patterns online. That’s right, I’m not going to provide you with any template, sorry! Just google ‘candy cane’, ‘Christmas stocking’, ‘gingerbread man’, ‘mitten’, ‘heart’ or — even better — draw your own shapes. Then assemble all your materials: various pairs of scissors, a pencil/pen, your glasses (optional), as many types and colours of thread as you wish, baker’s twine (if you own it), loads of buttons, fabric scraps, rick-rack, ribbon, pins and needles. You may notice that I’ve chosen a very limited colour palette because I believe that’s the key to success. But of course you can go wild and pick all the colours of the rainbow.

2- Gather all your felt scraps and turn your radio on!

3- I decided I’d make my templates the old-fashioned way: first I printed them out and then traced over them using some tracing paper I found at the bottom of a drawer (I think I have these sheets since primary school). I then traced the shapes onto a cereal box for durability.


4- Trace all your shapes onto felt and cut them neatly. Always trace and cut in pairs because you’ll be stuffing the ornaments later.


5- Here they are all cut and ready to be embelished.


6- Now comes the fun part: play around with rick-rack, ribbon, buttons and scraps until you are happy with how it looks. Then sew everything onto your ornament piece. There are so many possibilities here that I had to choose and show you how to make only one type of ornament. That means that from now on you’ll watch how to finish this star; then at the end of this set you’ll see other examples of ornaments you can make.

7- Let us get back to the star: make a loop (you’ll want to hang it on a tree branch, right?) and begin sewing the front and the back pannels together.

8- You can do it either by hand or machine and use different kinds of stiches. Here I sewed it by hand using the simplest stitch ever.


9- When you’re nearly finished, grab a bit of polyfill and stuff it through that little opening. You may want to use a chopstick or other pointy tool to get the stuffing in all the tiny and tricky places.

10- Close the opening. You’re done! 🙂


As I said, I’ll show you other examples of things you can make using this technique. Have fun and if you make something based on these instructions I’d love to see it!


Sunday Stash :: #3 and a winner!

Este é o meu Sunday stash de hoje: tecidos encarnados e brancos a lembrar o Natal. Passei o dia a fazer enfeites, daí o tema natalício desta escolha.
~
This is my Sunday stash for today: red and white prints that make me think of Christmas. I’ve spent the day making ornaments, hence the christmas-y theme of this choice.

Quanto ao sorteio do saco das maçãs, quem ganhou foi… a… Fulvia! A Fulvia escreveu :

Congratulations and keep doing what you are doing. I would also love to see, literally, some of the finer points of sewing tackled or explained. You have a great sense of beauty and you show it very well in your blog. I hope I win the bag! Thanks.

Fulvia, you did win the bag! Please send me an e-mail with your address so I can send you your bag asap!

PS. A Rocío venceu este sorteio mas nunca reclamou o prémio… Rocío, preciso da tua morada para te poder enviar o livro! Escreve-me ou deixa o teu e-mail na caixa de comentários; apagá-lo-ei logo que o veja.

Cartões de Natal :: Christmas Cards

Estou a gostar imenso de ler os comentários ao mais recente giveaway e tenho de começar a tomar notas! Vou decididamente tentar fazer uns posts sobre dar os primeiros passos na costura, mas desde já deixo um disclaimer: eu aprendi sozinha e só coso à máquina há dois anos… posso é partilhar a maneira como me fui aventurando neste mundo. No fundo, resume-se apenas a isto: com a ajuda da internet e sem medos!
~
I’m really enjoying reading all the comments on my most recent giveaway and I have to start jotting down some notes! I’ll definitely try to write some posts about starting to sew but I have to make a disclaimer: I am self-taught and I’ve only been machine-sewing for two years… what I can do is share the way I’ve been venturing into this world. In a nutshell, it all comes to this: online help and no fears!


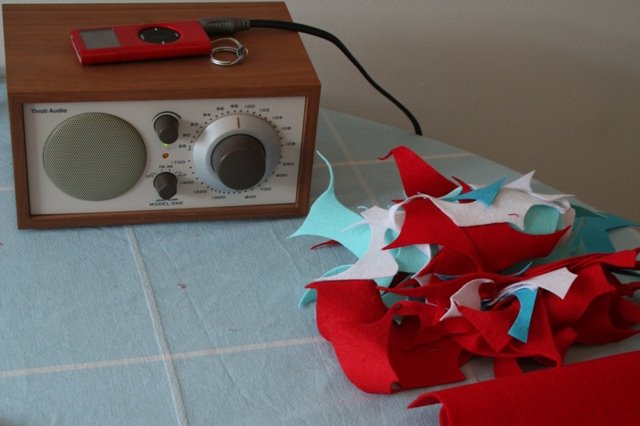
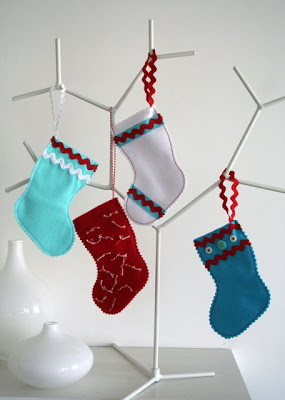
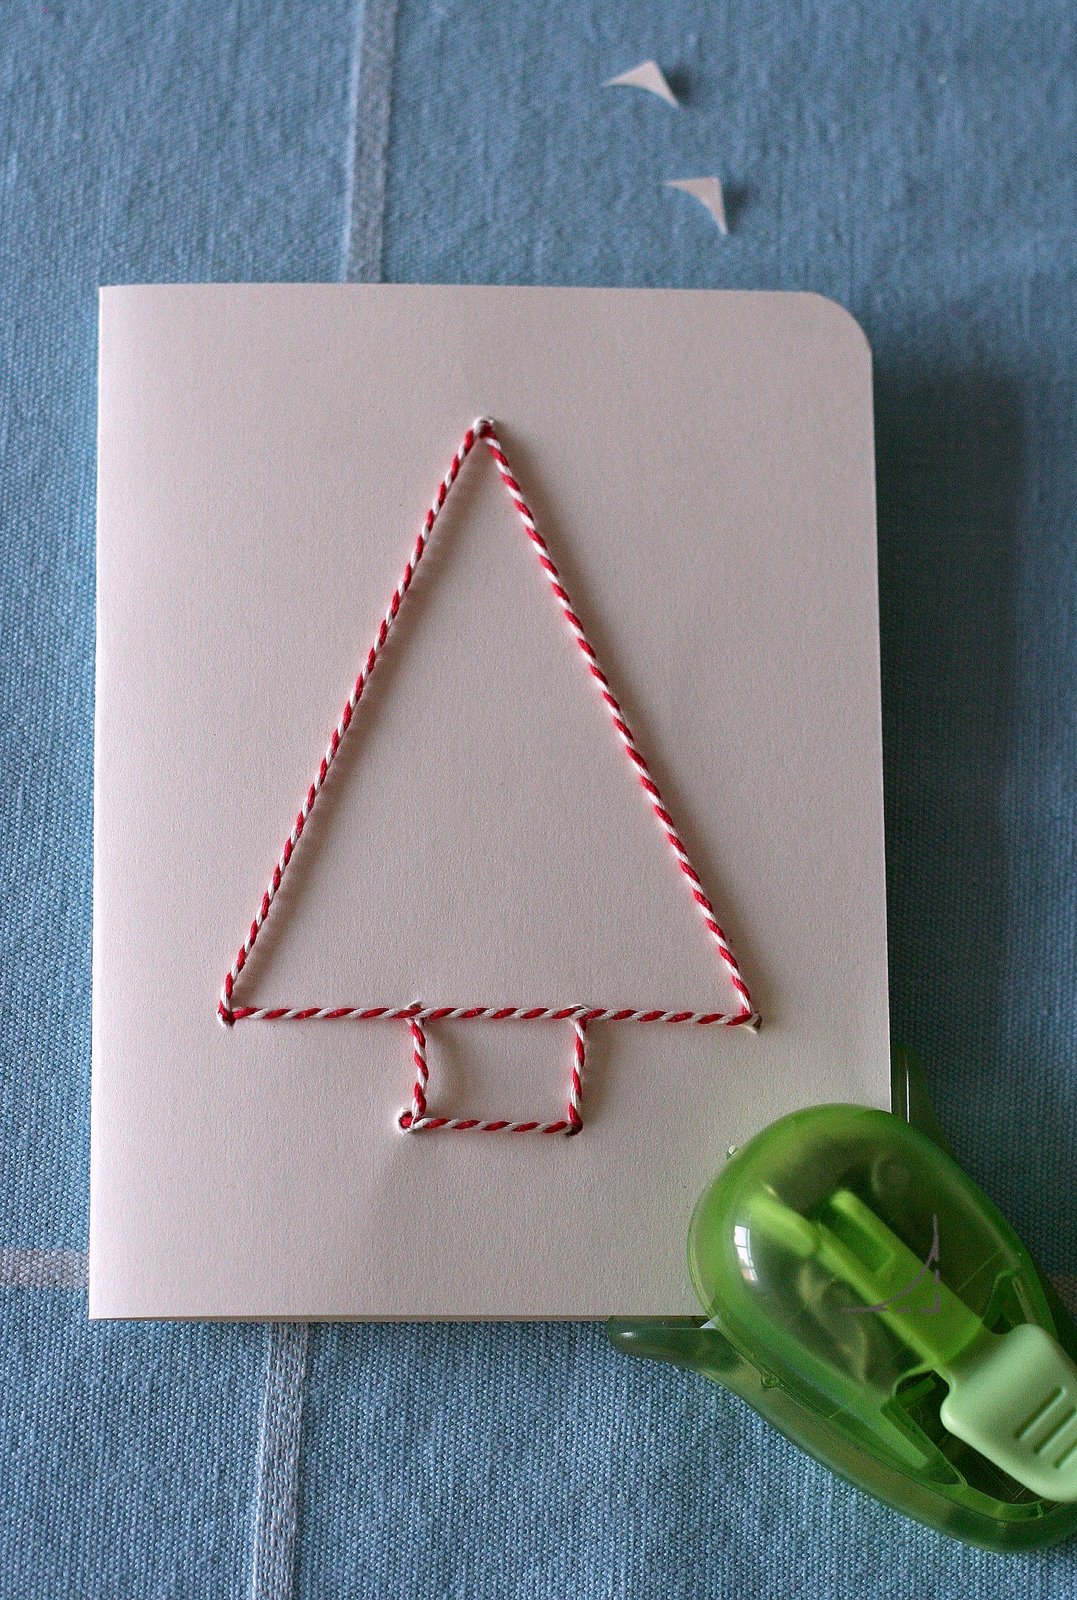
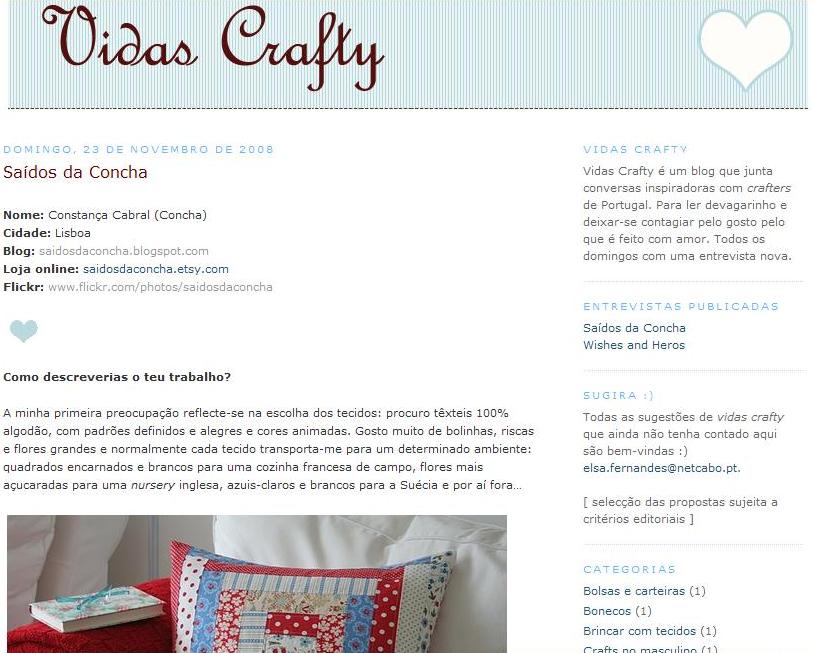
Entretanto comecei a fazer os meus cartões de Natal. Este ano, e visto que começo a ter o meu pequeno negócio, vou enviá-los não só a família e amigos, mas também a quem me comprou peças ao longo deste ano. Por isso, se é cliente do Saídos da Concha, já sabe! (se calhar tinha mais graça se fosse surpresa…)
Meanwhile, I have started making my Christmas cards. This year — since I’m starting my own little business — I’ll be sending them not only to friends and family but also to everyone who has bought something from me this past year. So, if you are a Saídos da Concha customer, now you know! (maybe this would have been more interesting if it had come as a surprise…)

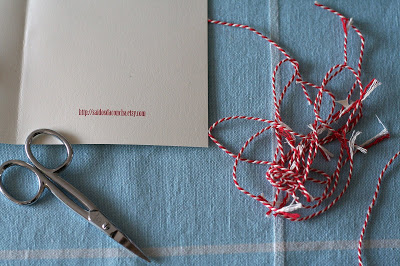
Este ano estou rendida a três novas aquisições: o almejado baker’s twine (este cordel encarnado e branco à l’ancienne que encontrei na Dille & Kamille na Bélgica), uma guilhotina de papel (presente de Natal de há dois anos e apenas estreado ontem…) e um “arredondador de cantos” (comprado nos EUA, onde floresce a indústria dedicada ao scrapbooking).
This year I’m fascinated by my three new acquisitions: the much-desired baker’s twine (found at Dille & Kamille in Belgium), a paper guillotine (which I was given two years ago but which made its debut only yesterday) and a corner rounder (bought in the US where the scrapbooking industry flourishes).

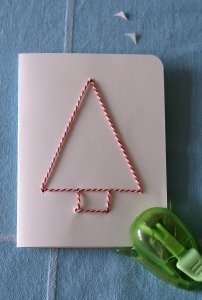
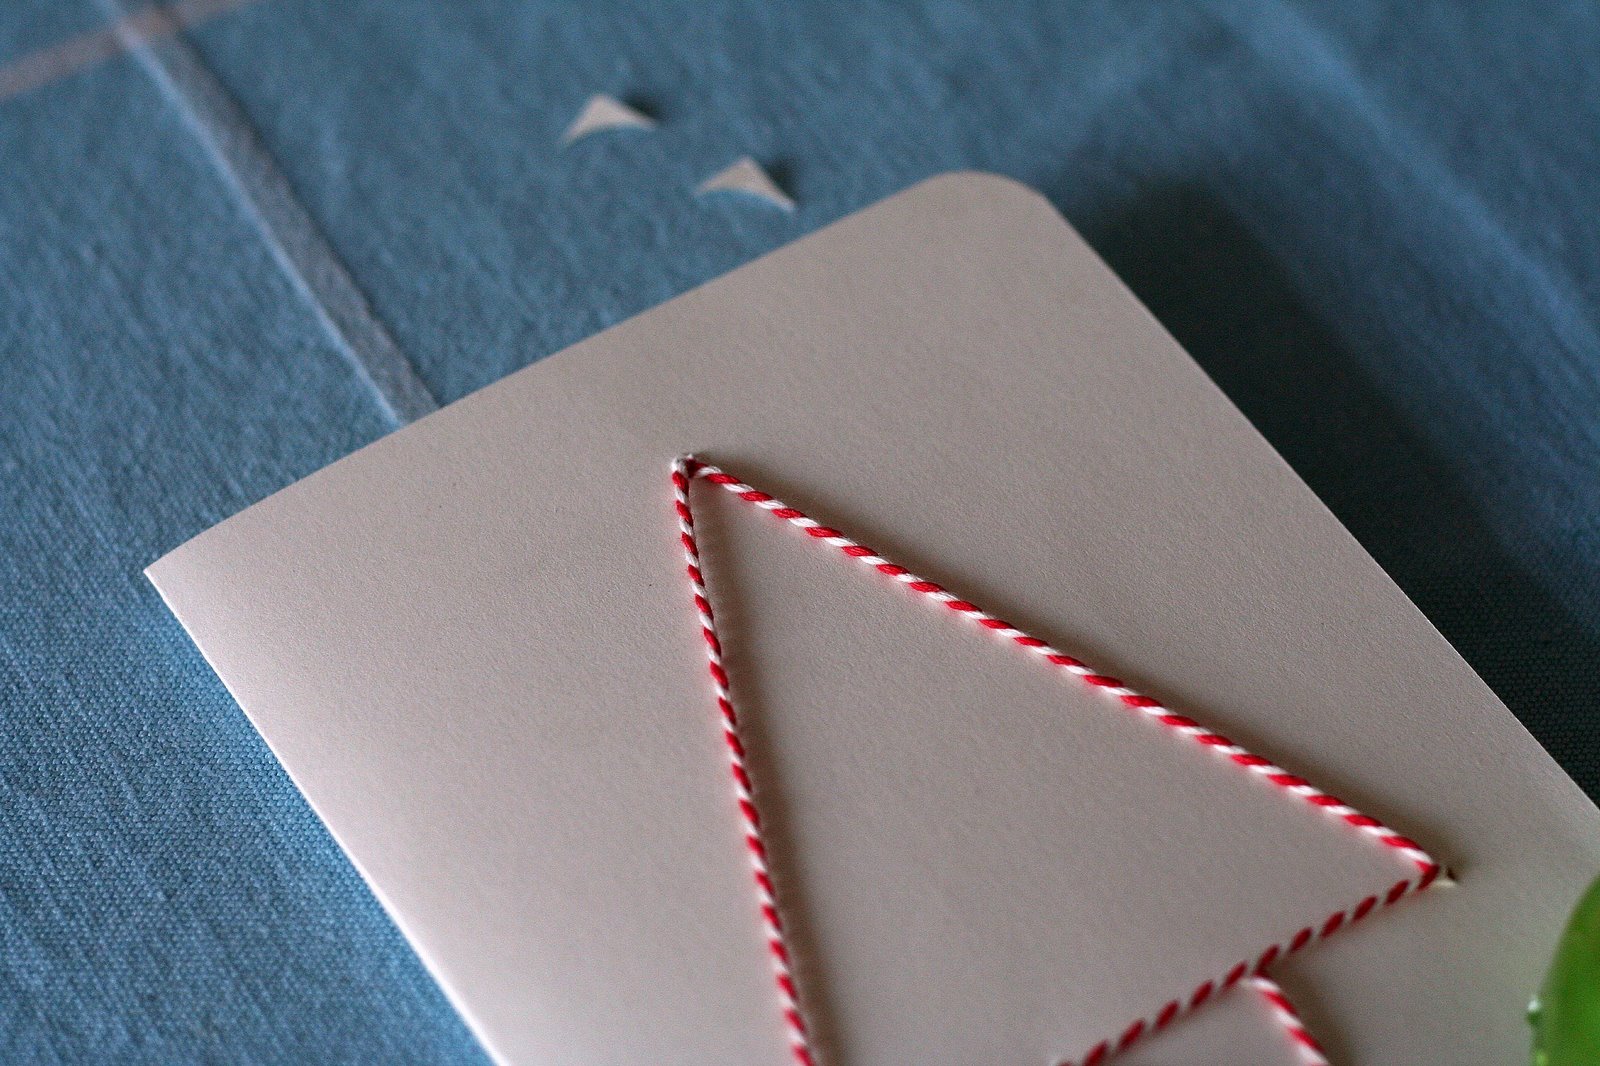
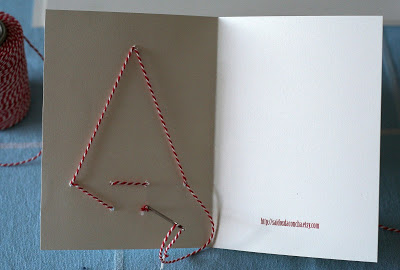
Decidi-me por um esquema bastante básico: guilhoteinei folhas A4 a meio, imprimi o endereço da minha loja, dobrei a folha a meio e desenhei uma árvore de Natal com agulha e fio. Em seguida, arredondei os cantos e escrevi os votos de boas festas.
I went for a rather basic design: I cut A4 leaves in half, printed my shop‘s address, folded the leaf in half and drew a Christmas tree with needle and twine. Then I rounded the corners and wrote down my wishes.

2nd blog-anniversary and a giveaway!

Este blog faz dois anos e é altura de comemorar. Ter um blog traz a reboque muitas coisas boas e uma delas é, indiscutivelmente, uma audiência. Hoje celebro o facto de não escrever para o vazio, mas sim para pessoas que comentam o que faço, que me escrevem e-mails e que sabem quem sou. Fiz este saco de Outono para vocês: para entrarem no sorteio, basta que escrevam sobre assuntos que gostariam de ver aqui tratados. Talvez dar os primeiros passos na costura? Ou to craft or not to craft? Digam de vossa justiça até 6ª feira!
This blog is now two years old and I feel it’s time to commemorate. Having a blog brings along many good things, one of them being an audience. Today I celebrate the fact that I’m not writing into the void; I write for people that commet on what I make, write me e-mails and know who I am. I have made this Autumn bag for you: to enter the giveaway, all you have to do is tell me about subjects you’d like me to write about. Maybe getting started sewing? Or perhaps to craft or not to craft? I’ll be open to your suggestions until Friday!

Vidas Crafty

Hoje saiu a minha entrevista no Vidas Crafty, um blog que junta conversas inspiradoras com crafters de Portugal. Responder a tantas perguntas sobre mim e o Saídos da Concha foi um exercício engraçado e útil; agora só espero que gostem de ler a entrevista! Obrigada Elsa!
My interview at Vidas Crafty has been published today… but it’s in Portuguese! Nevertheless, if you want to give it a try, pop over here. Thanks so much, Elsa!