Refashion Week :: From Shirts to Shorts

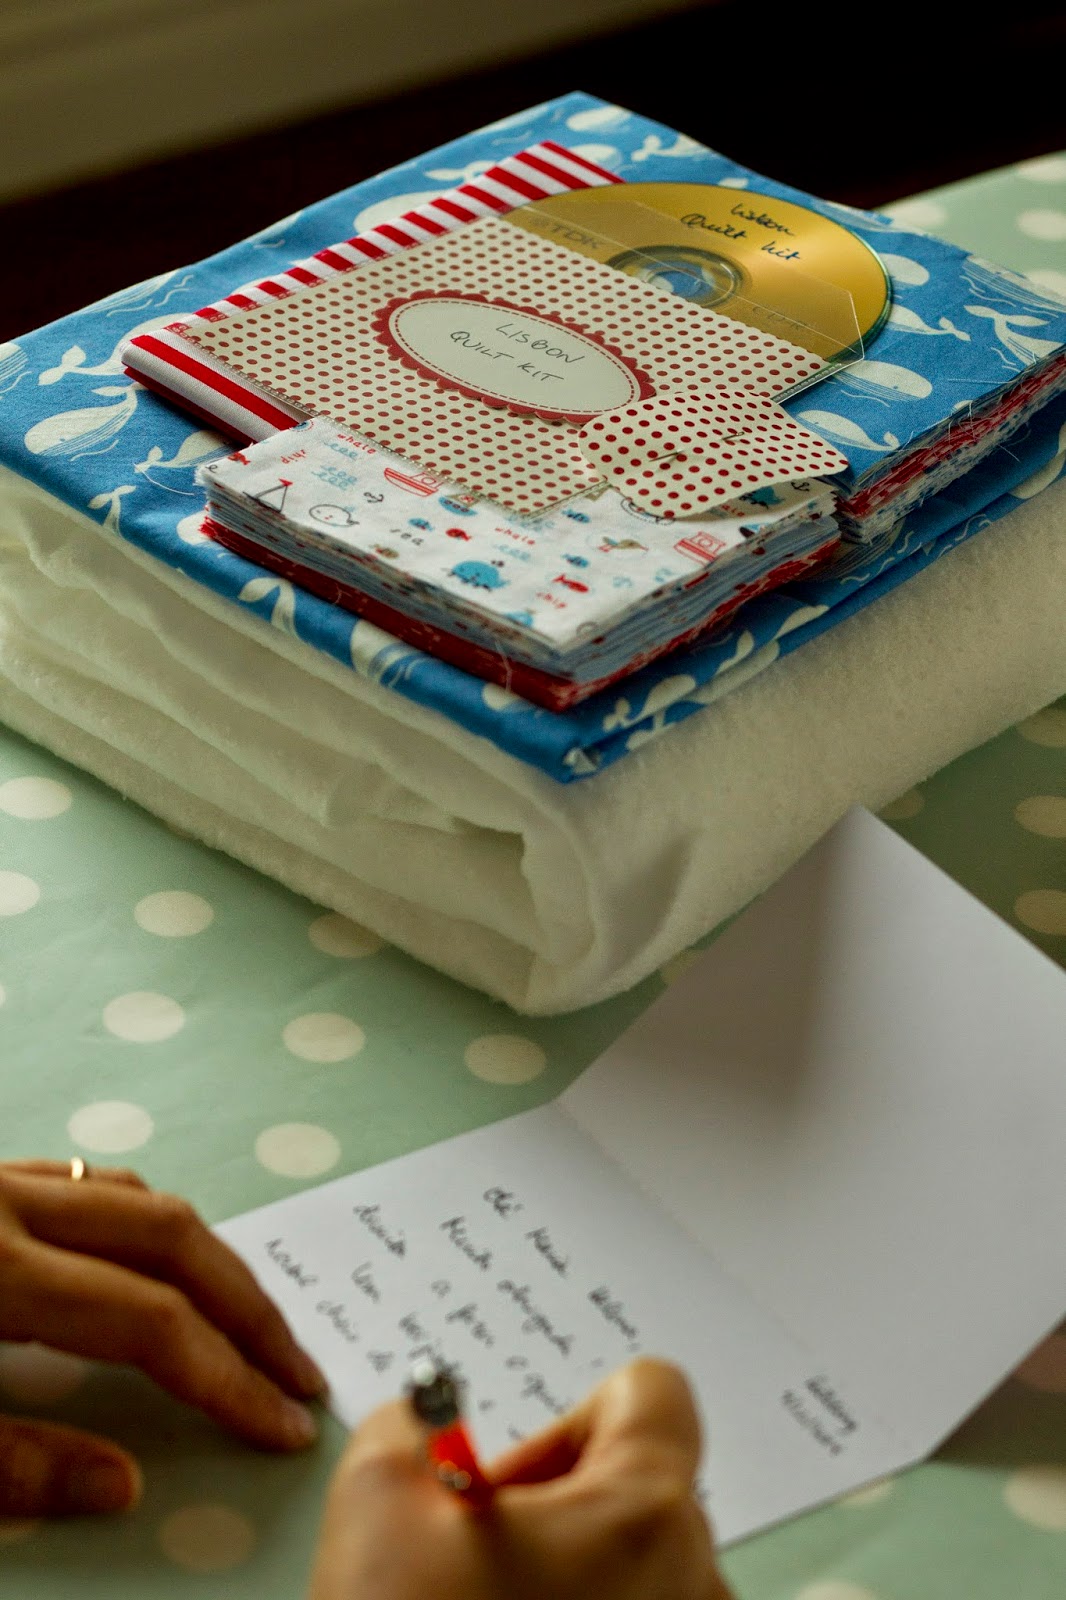
A Magda desafiou-me para participar na Refashion Week, juntamente com uma série de outras bloggers, todas elas portuguesas! Qual foi a primeira coisa em que pensei? Aproveitar camisas, claro! 
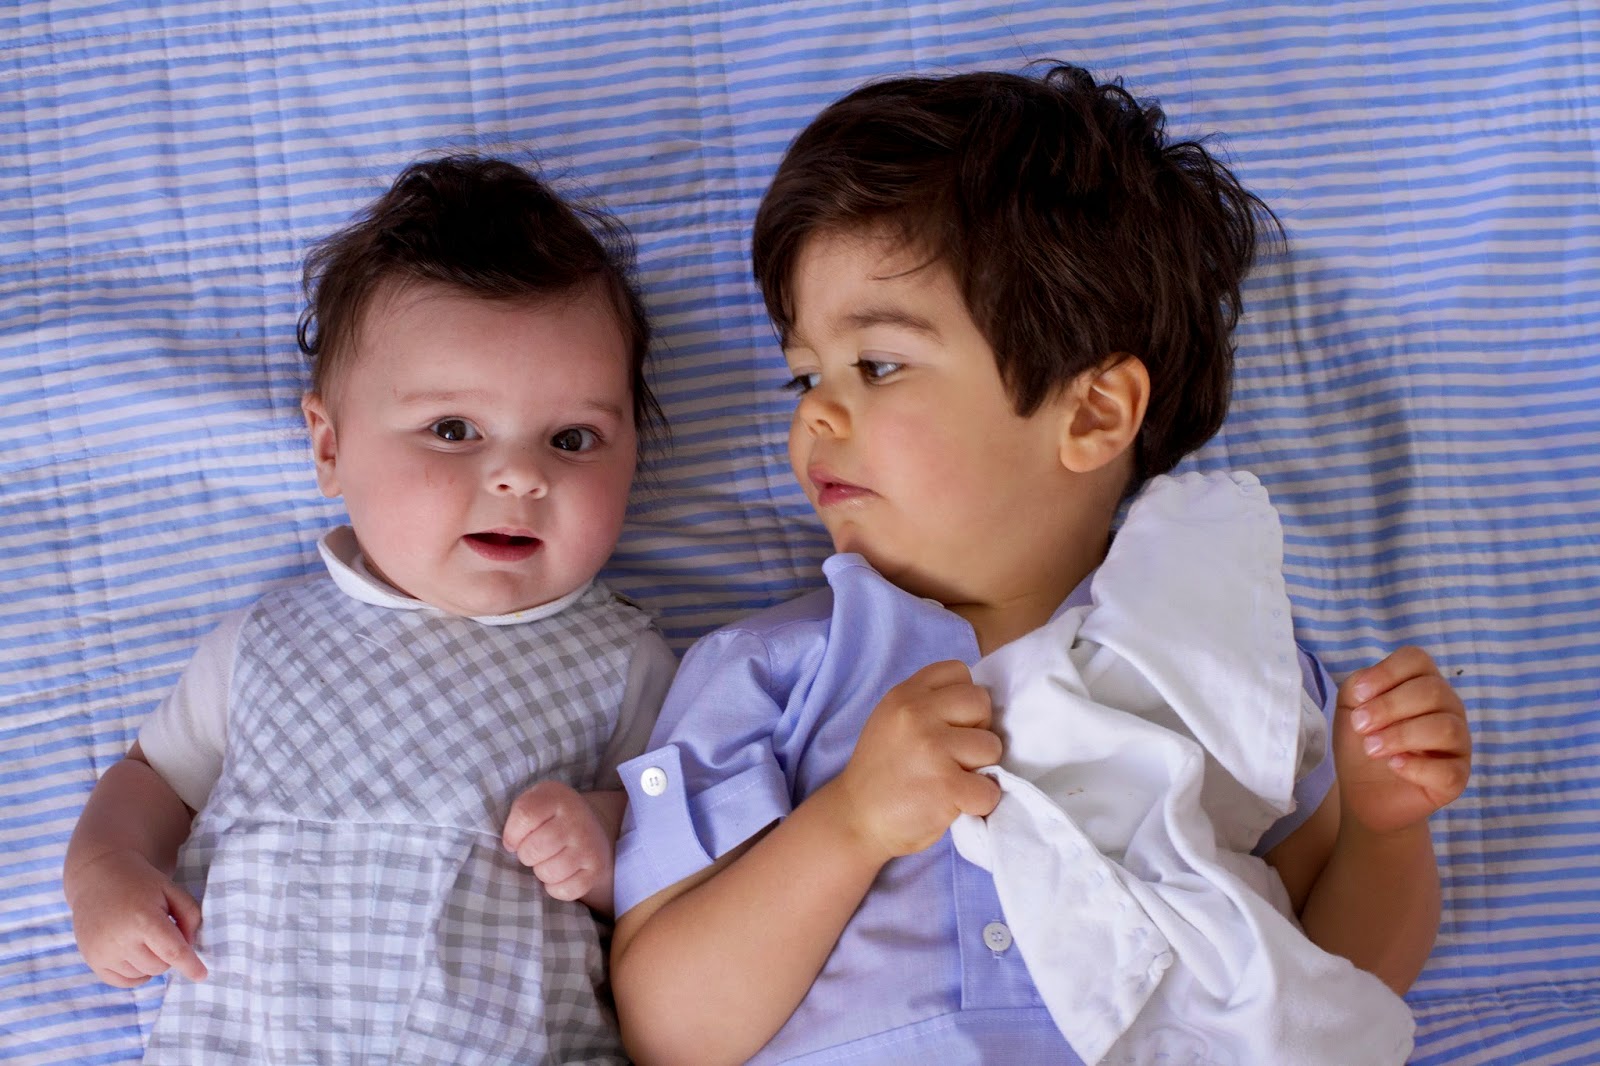
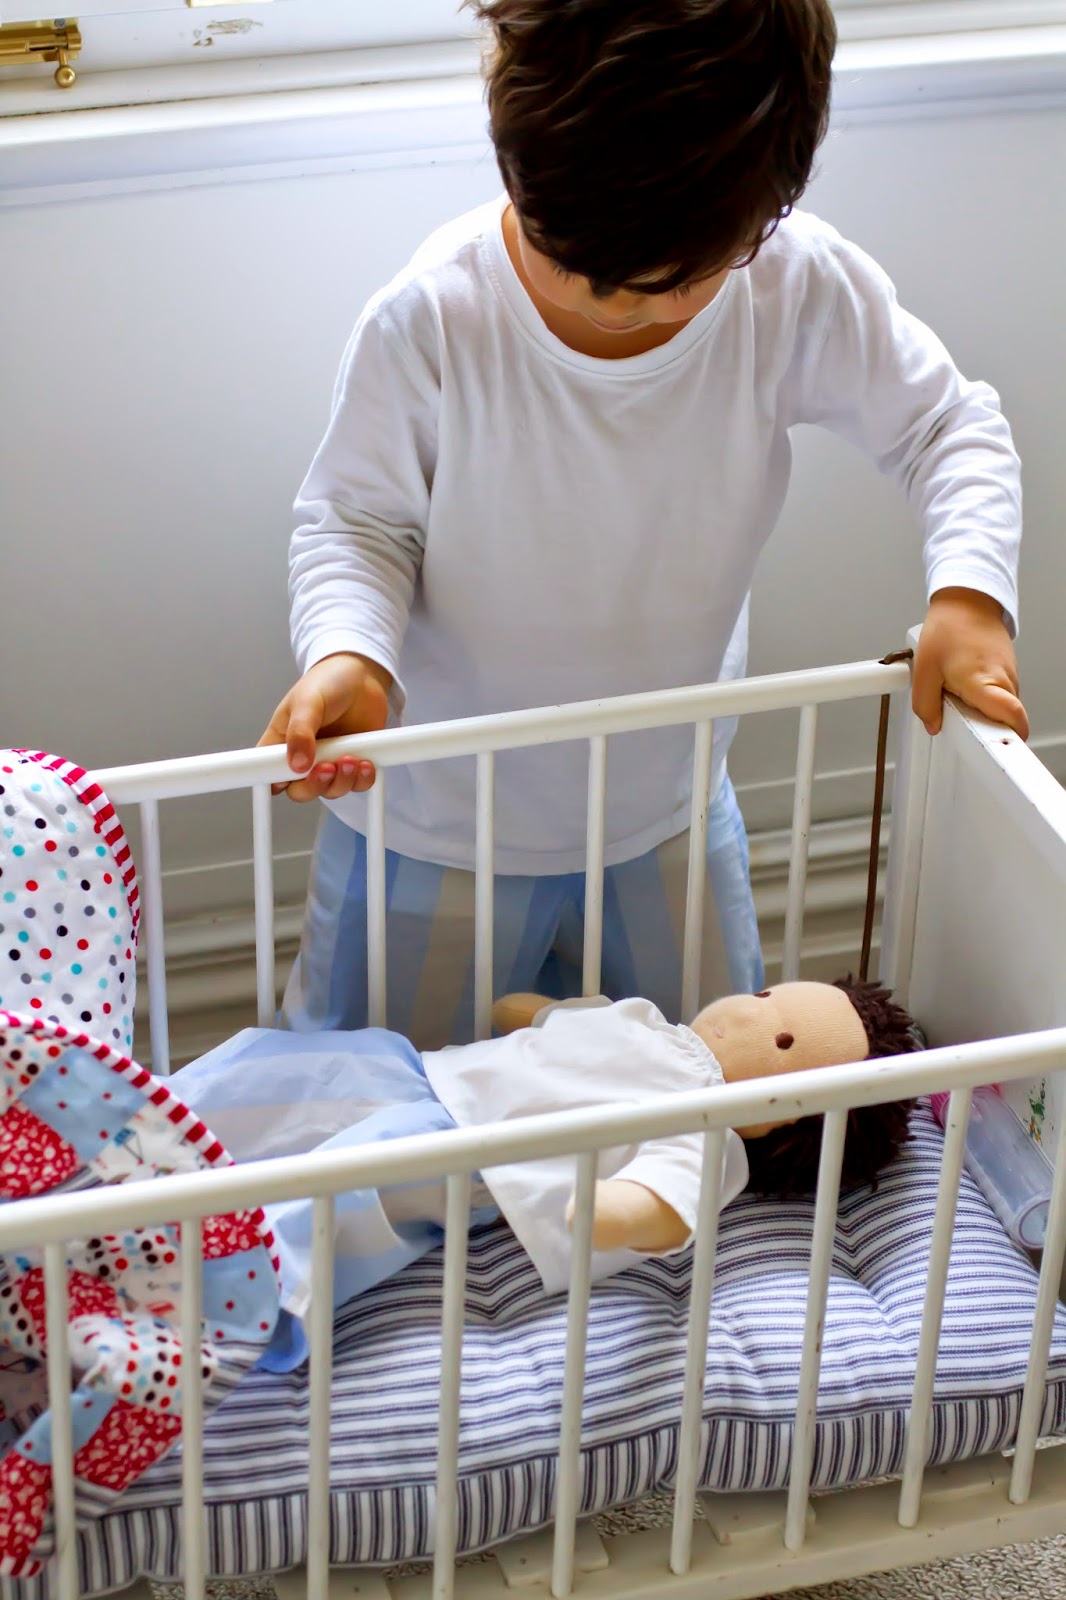
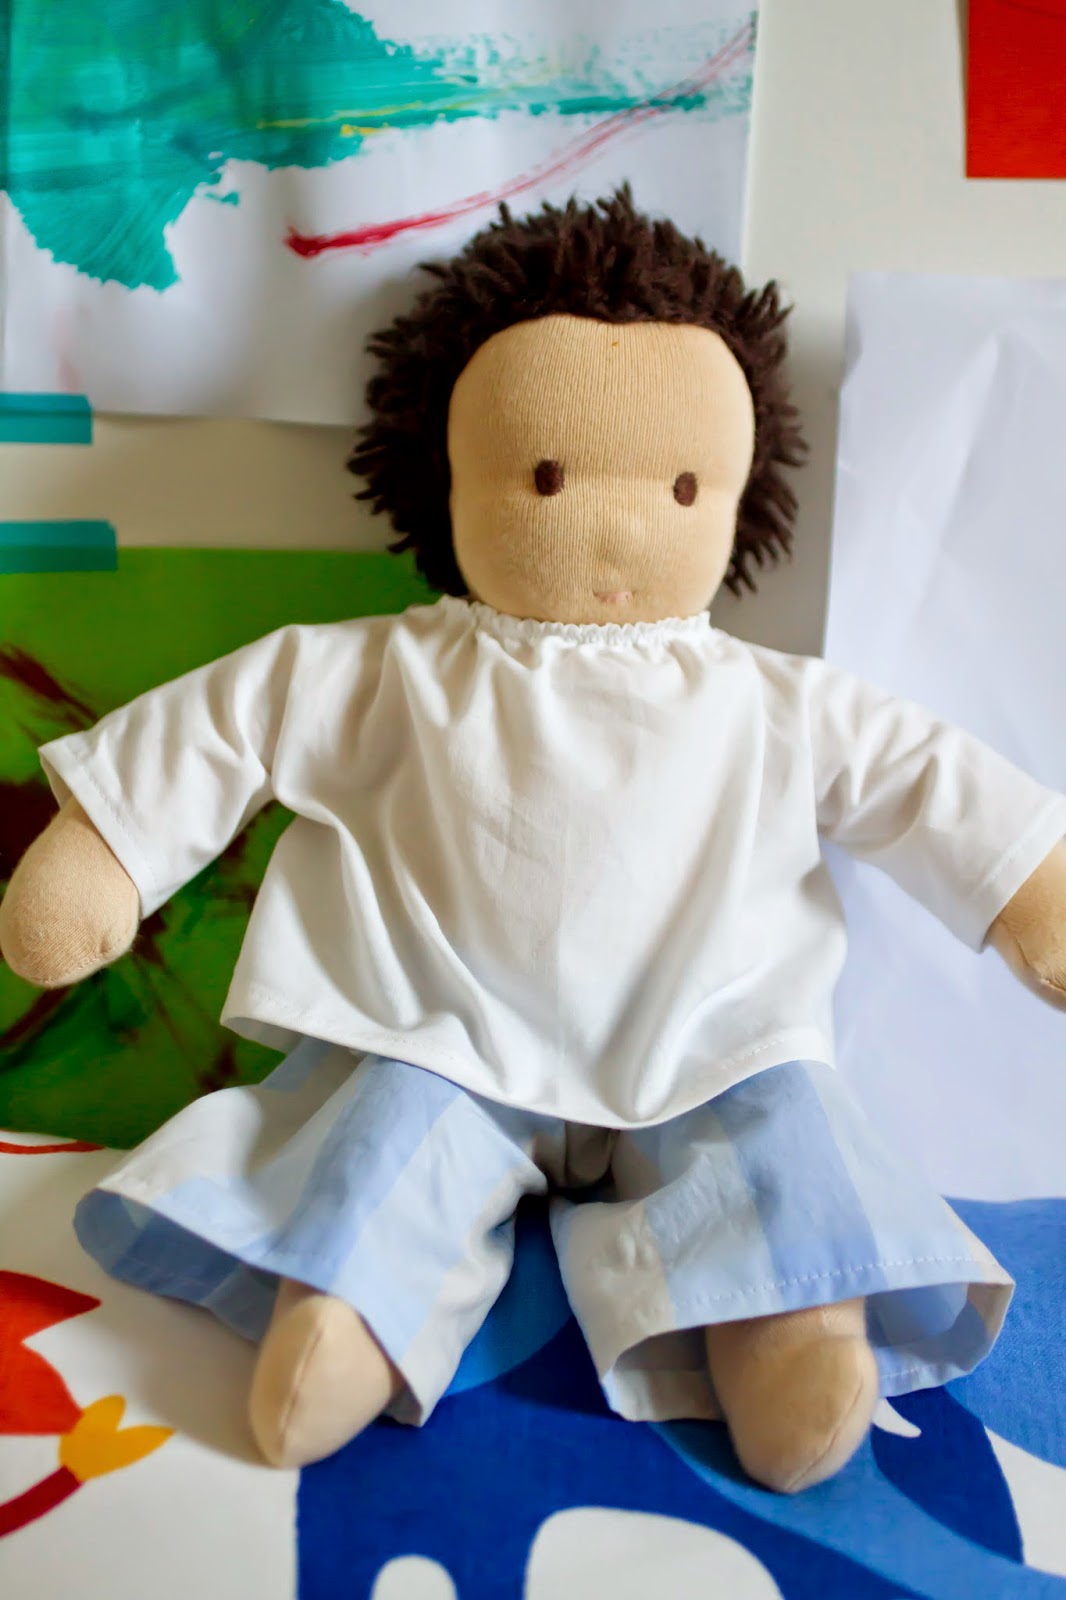
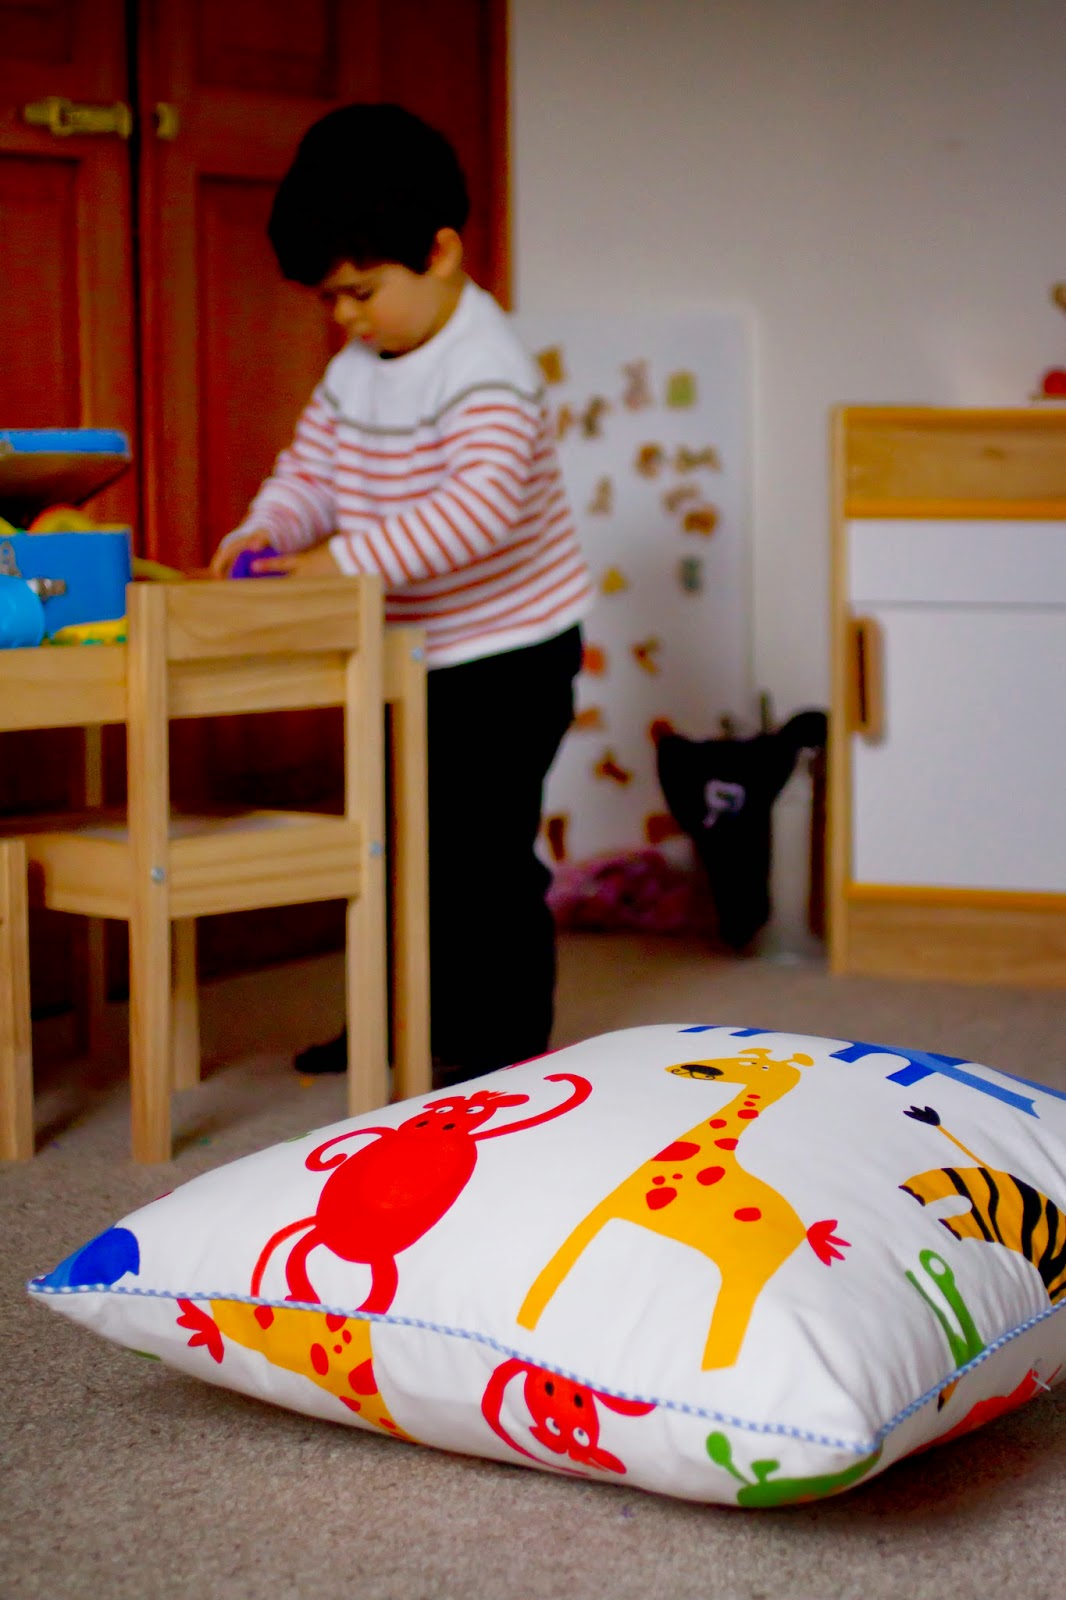
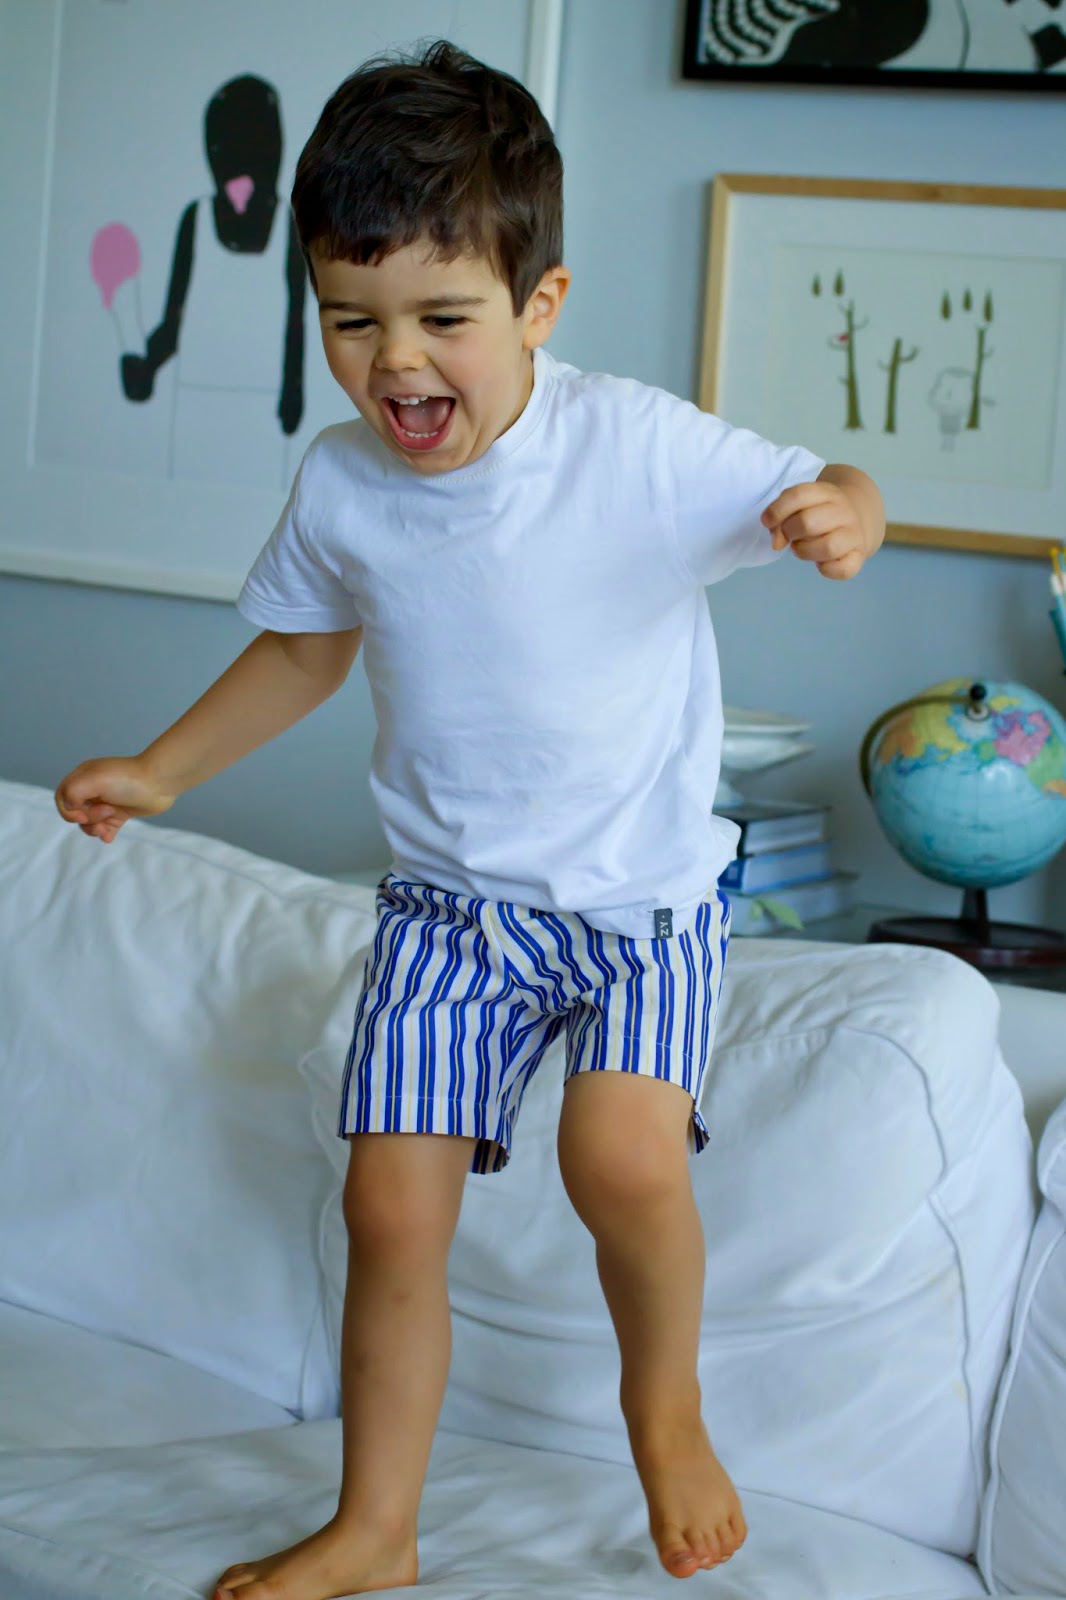
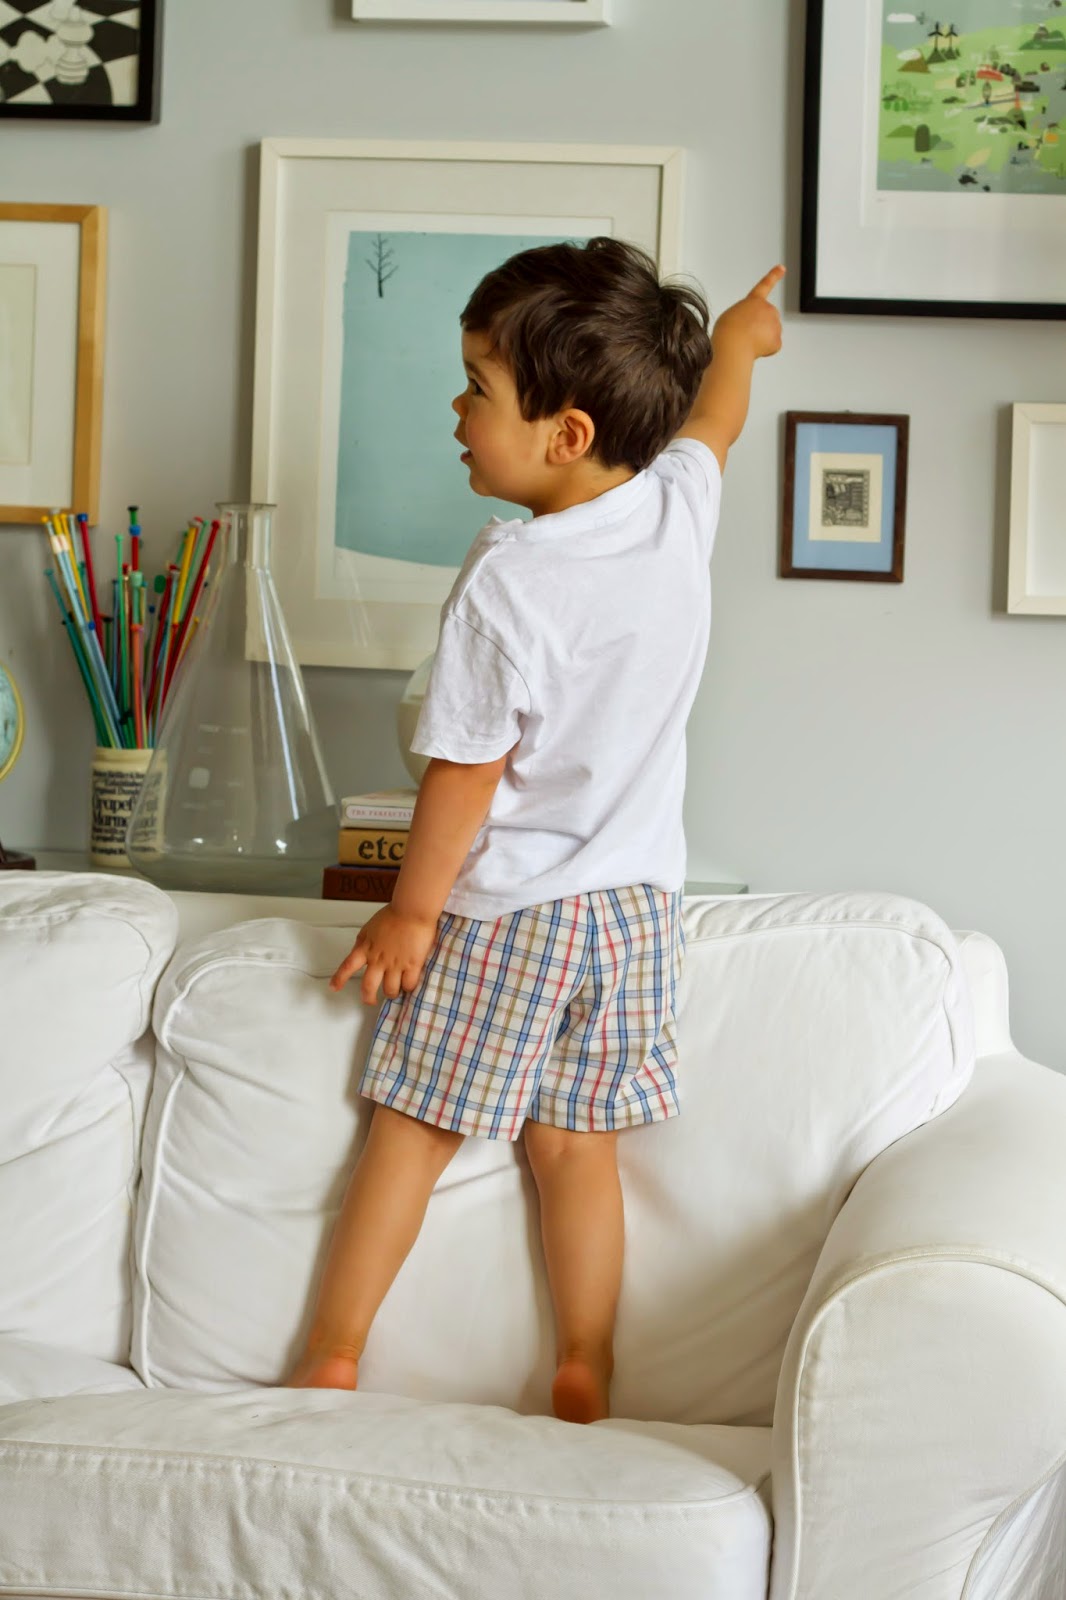
Com a chegada do Verão, o Rodrigo estava a precisar de pijamas frescos. À semelhança daquilo que fiz há dois anos, aproveitei camisas do meu pai e do Tiago para fazer-lhe quatro pares de calções, mas desta vez usei um molde diferente: os Sunny Day Shorts do Oliver + S. 
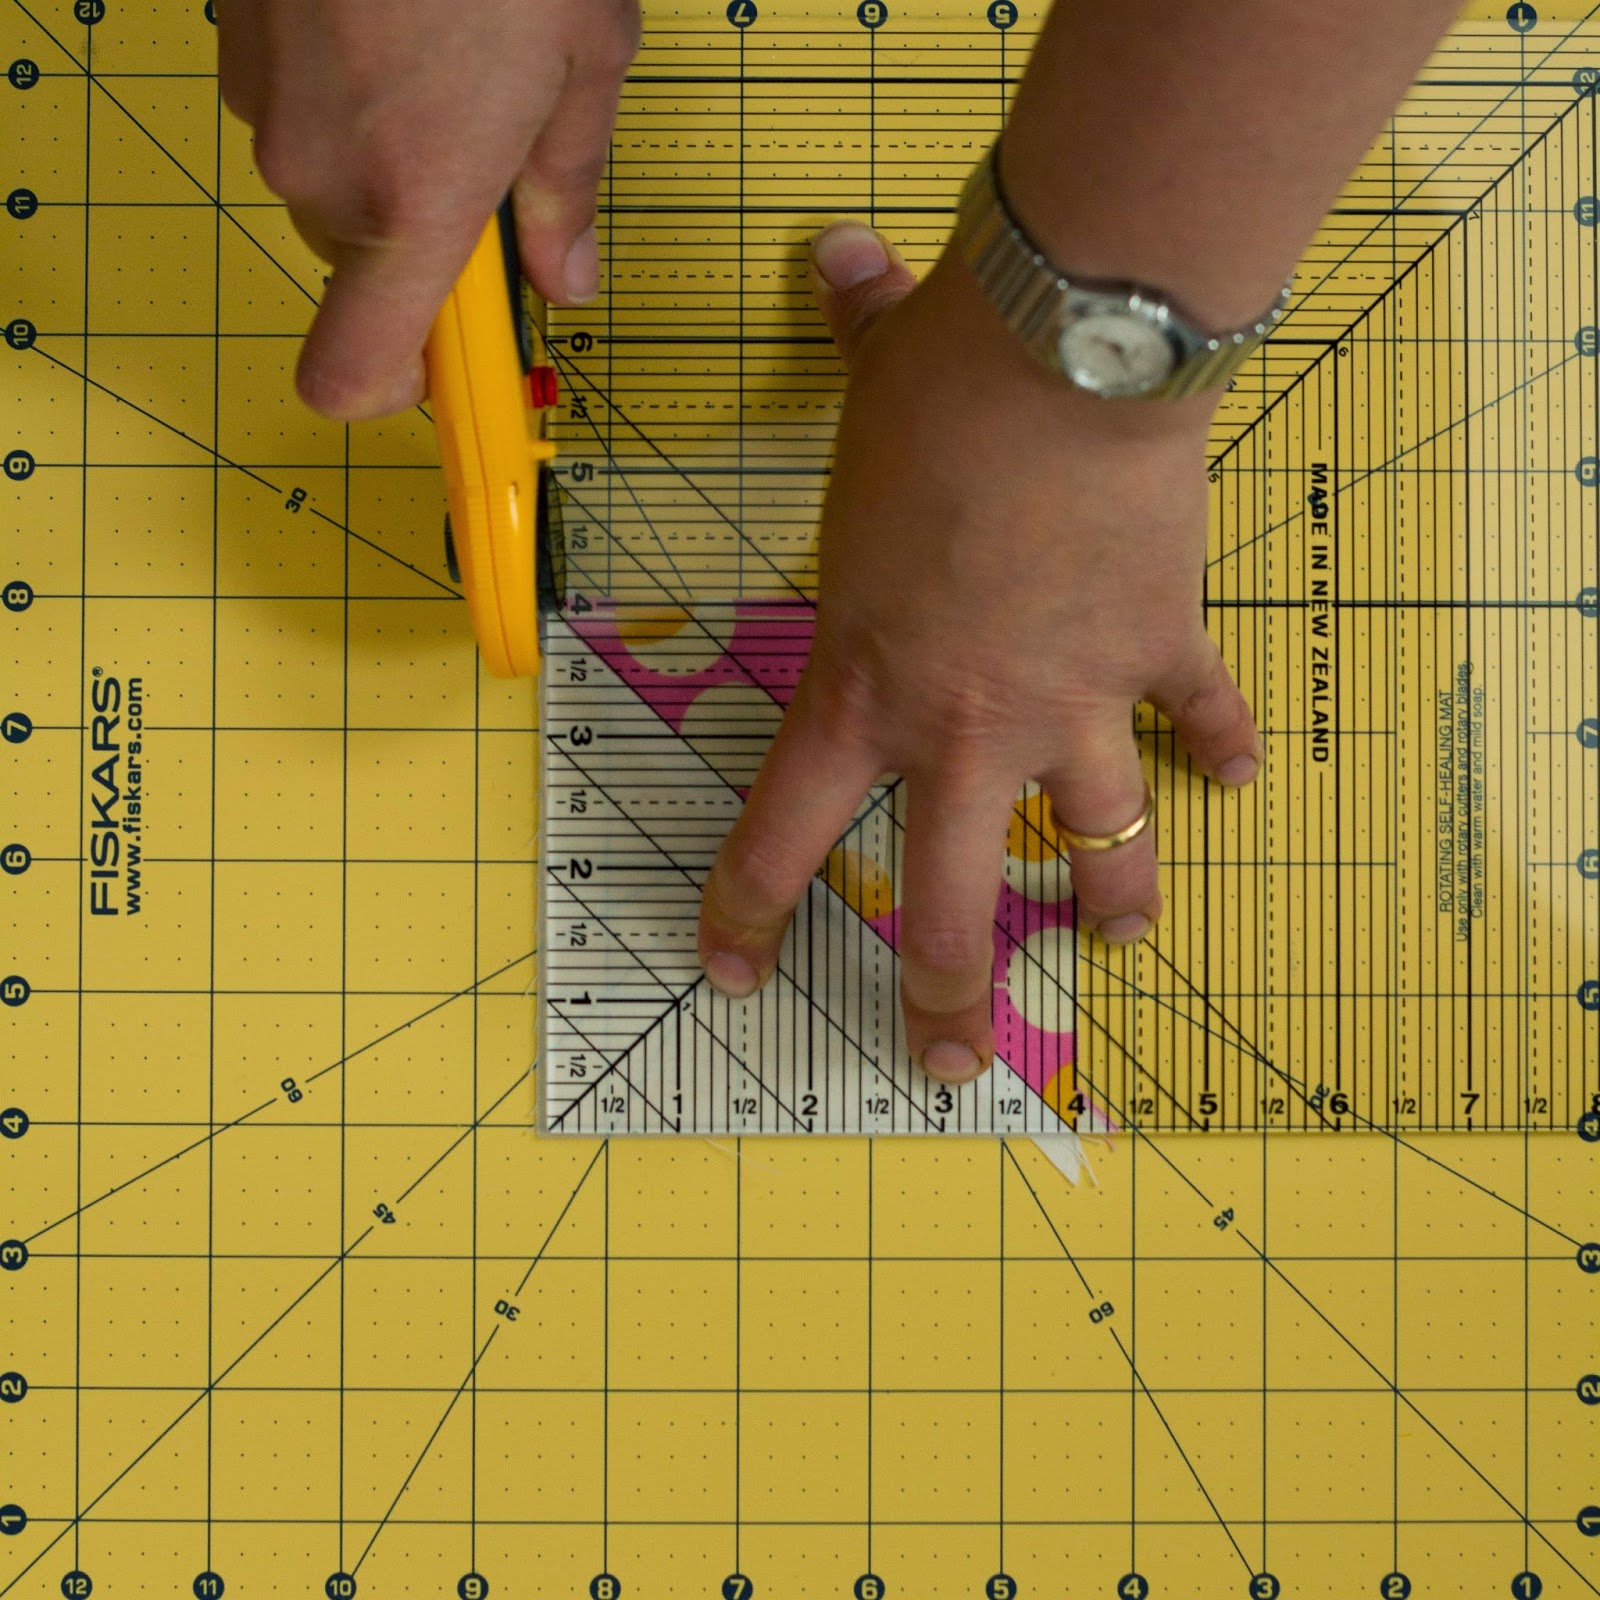
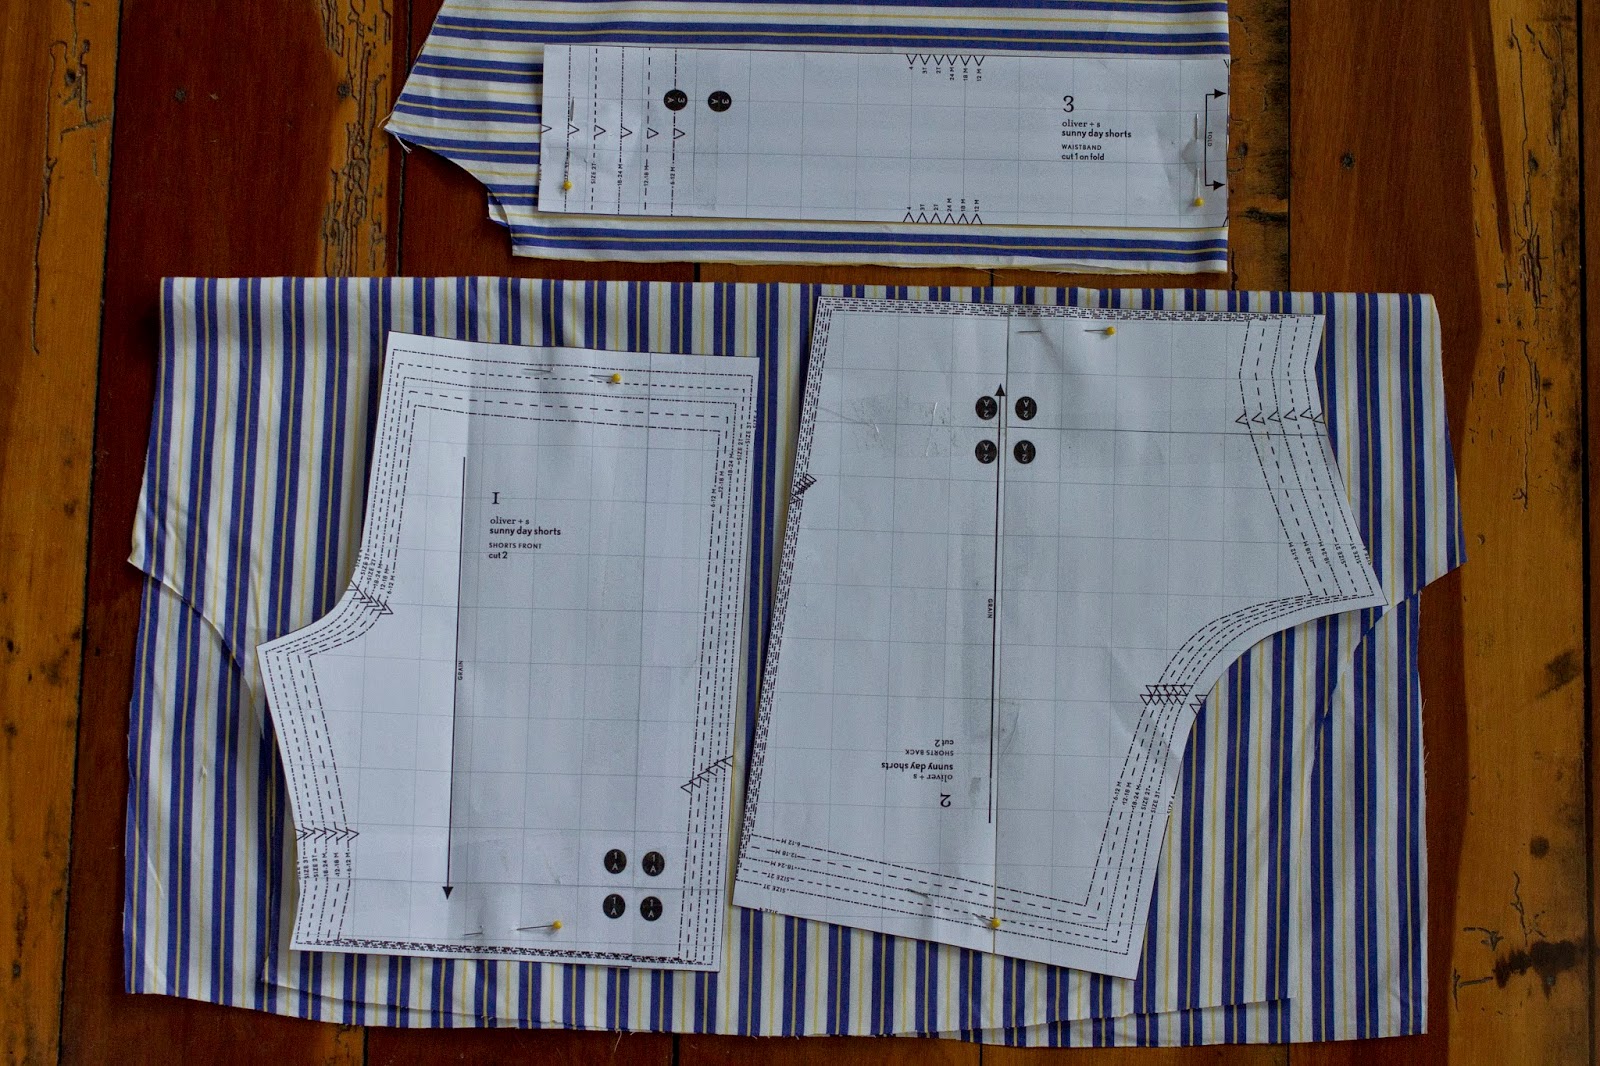
O molde é gratuito mas não deixa de ser impecável (os moldes Oliver + S são irrepreensíveis). As únicas alterações que fiz foram: 1- coser tudo com costuras inglesas e 2- arredondar um bocado a frente dos calções, porque o gancho era demasiado grande e fazia uma espécie de fole. Usei o tamanho 4 anos para o Rodrigo, que vai fazer 3 anos daqui a um mês (o primeiro par que fiz — e que não fotografei — foi com o tamanho 3 anos e achei que estavam bons agora, mas não serviriam daqui a seis meses… e quero que os calções voltem a ser usados durante o Verão português).
Dá gosto fazer costuras assim! Hoje em dia acho que ninguém cose para poupar dinheiro, mas este projecto é daqueles em que só se gasta linha, electricidade e tempo. E é tão bom vê-lo a usar calções confortáveis, frescos e com bom corte, e pensar que os fiz com materiais reciclados. 
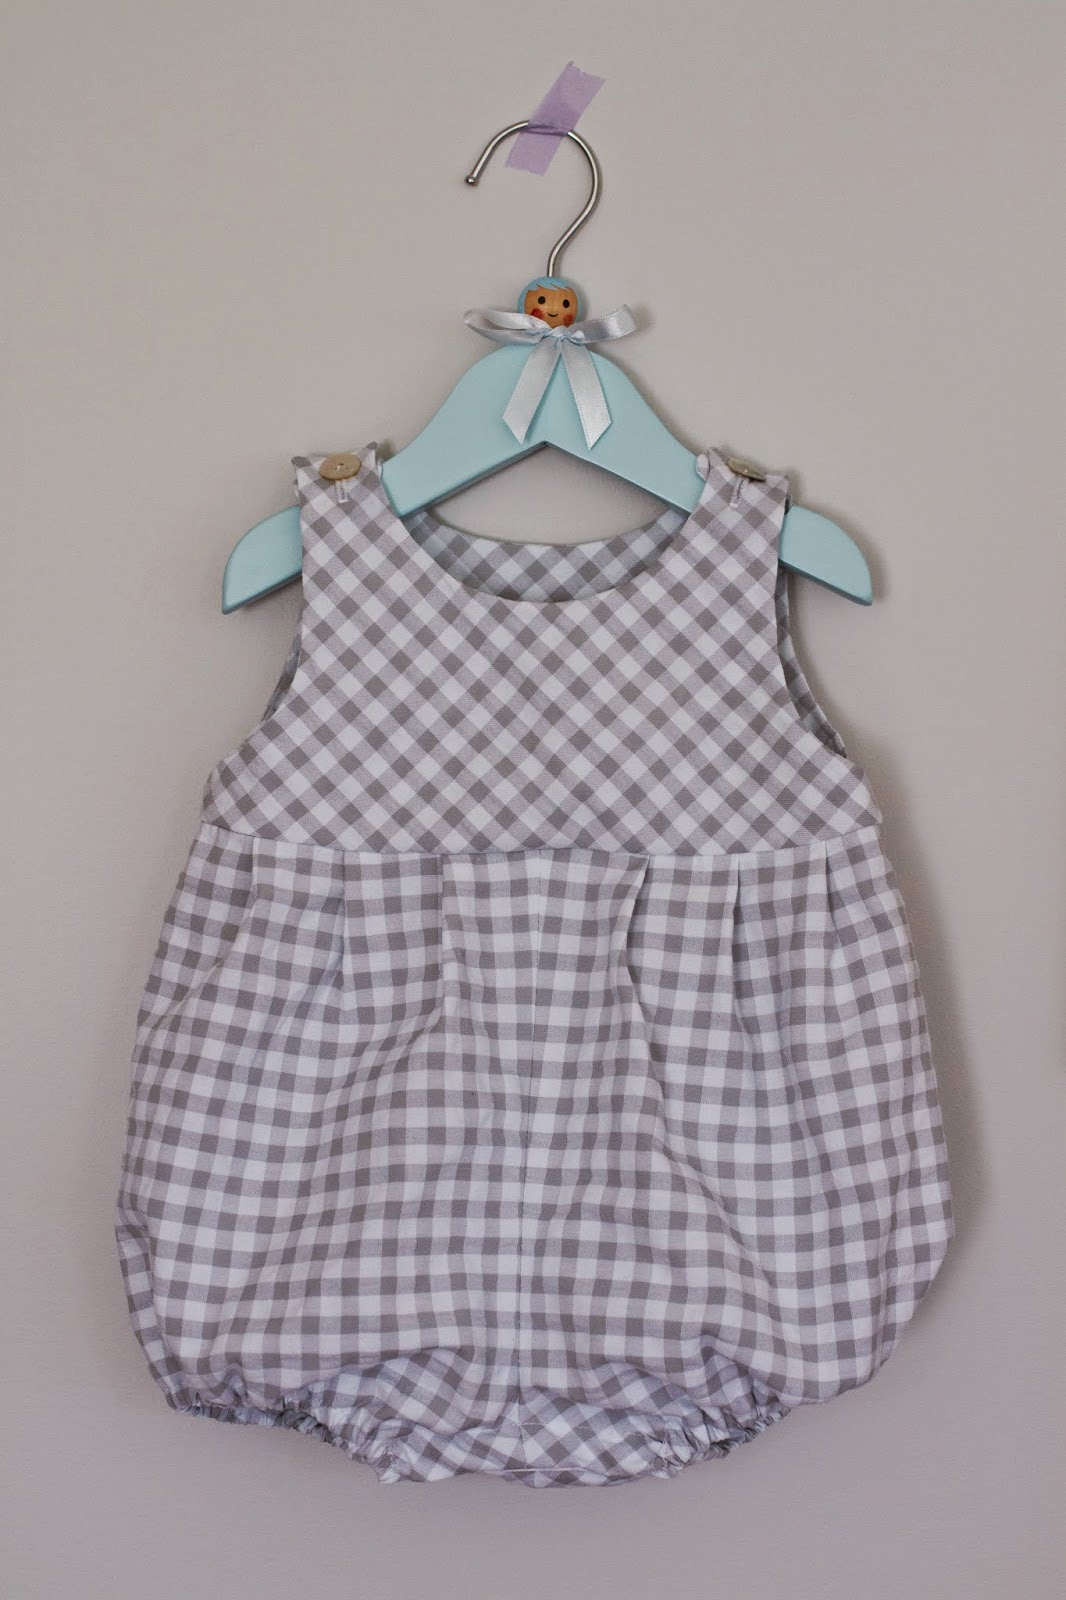
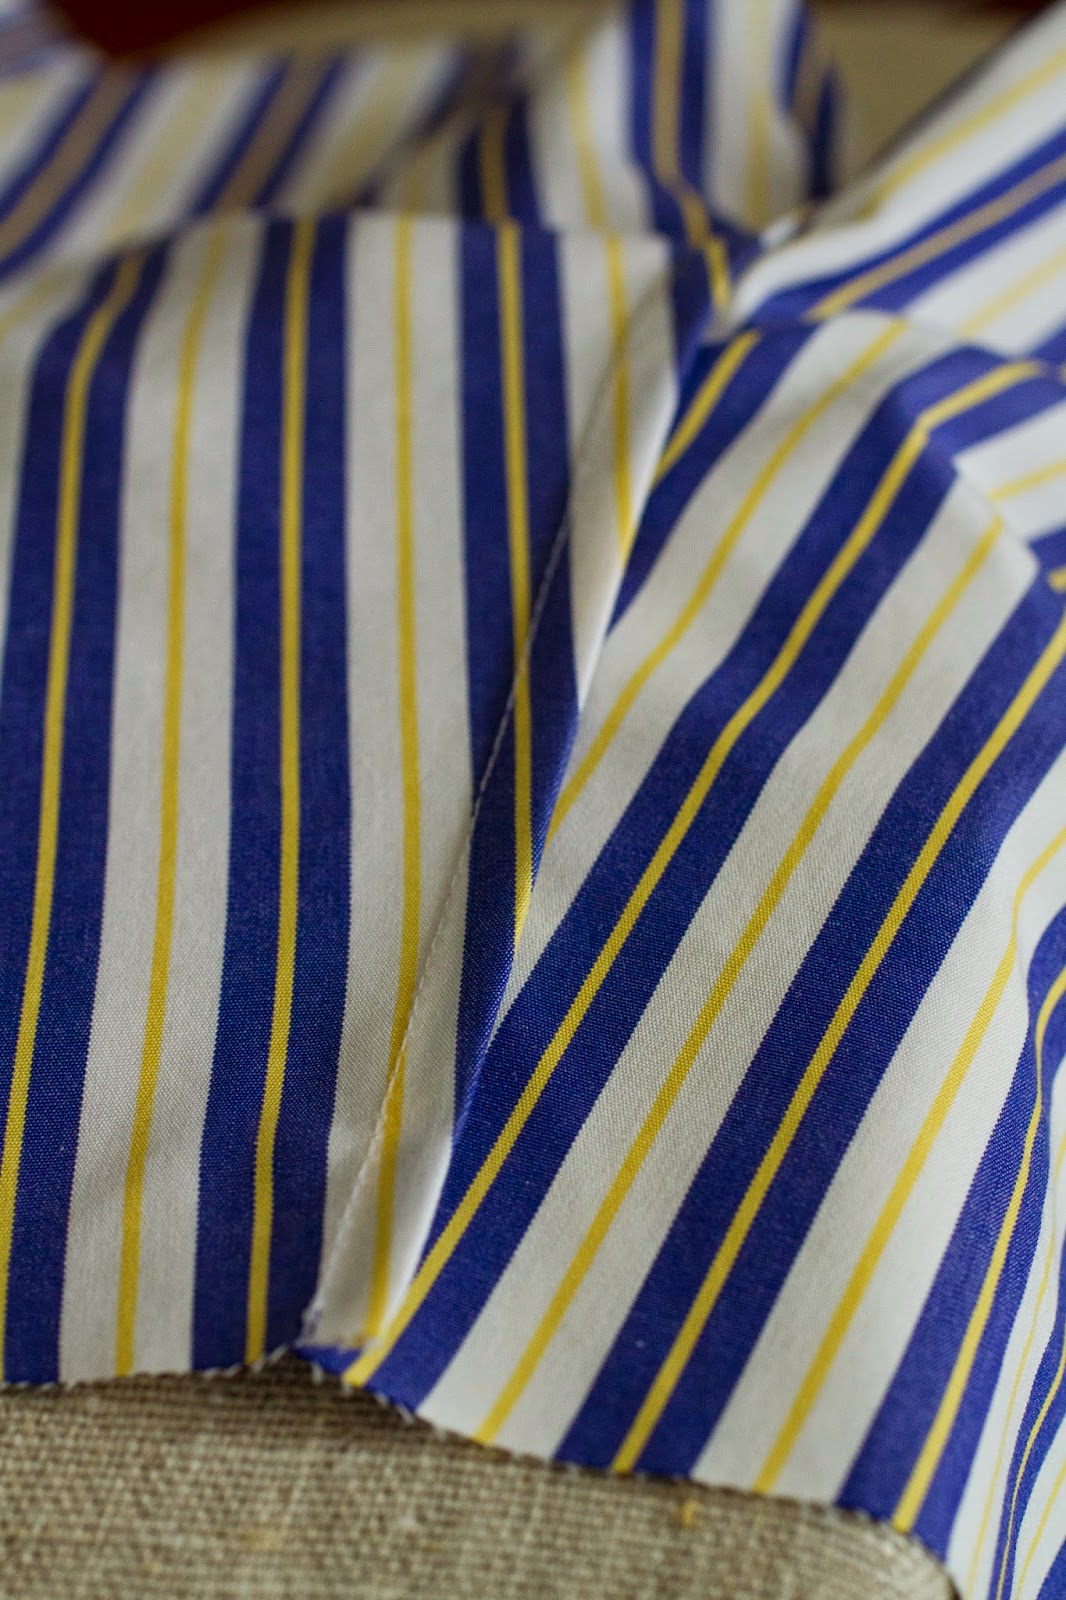
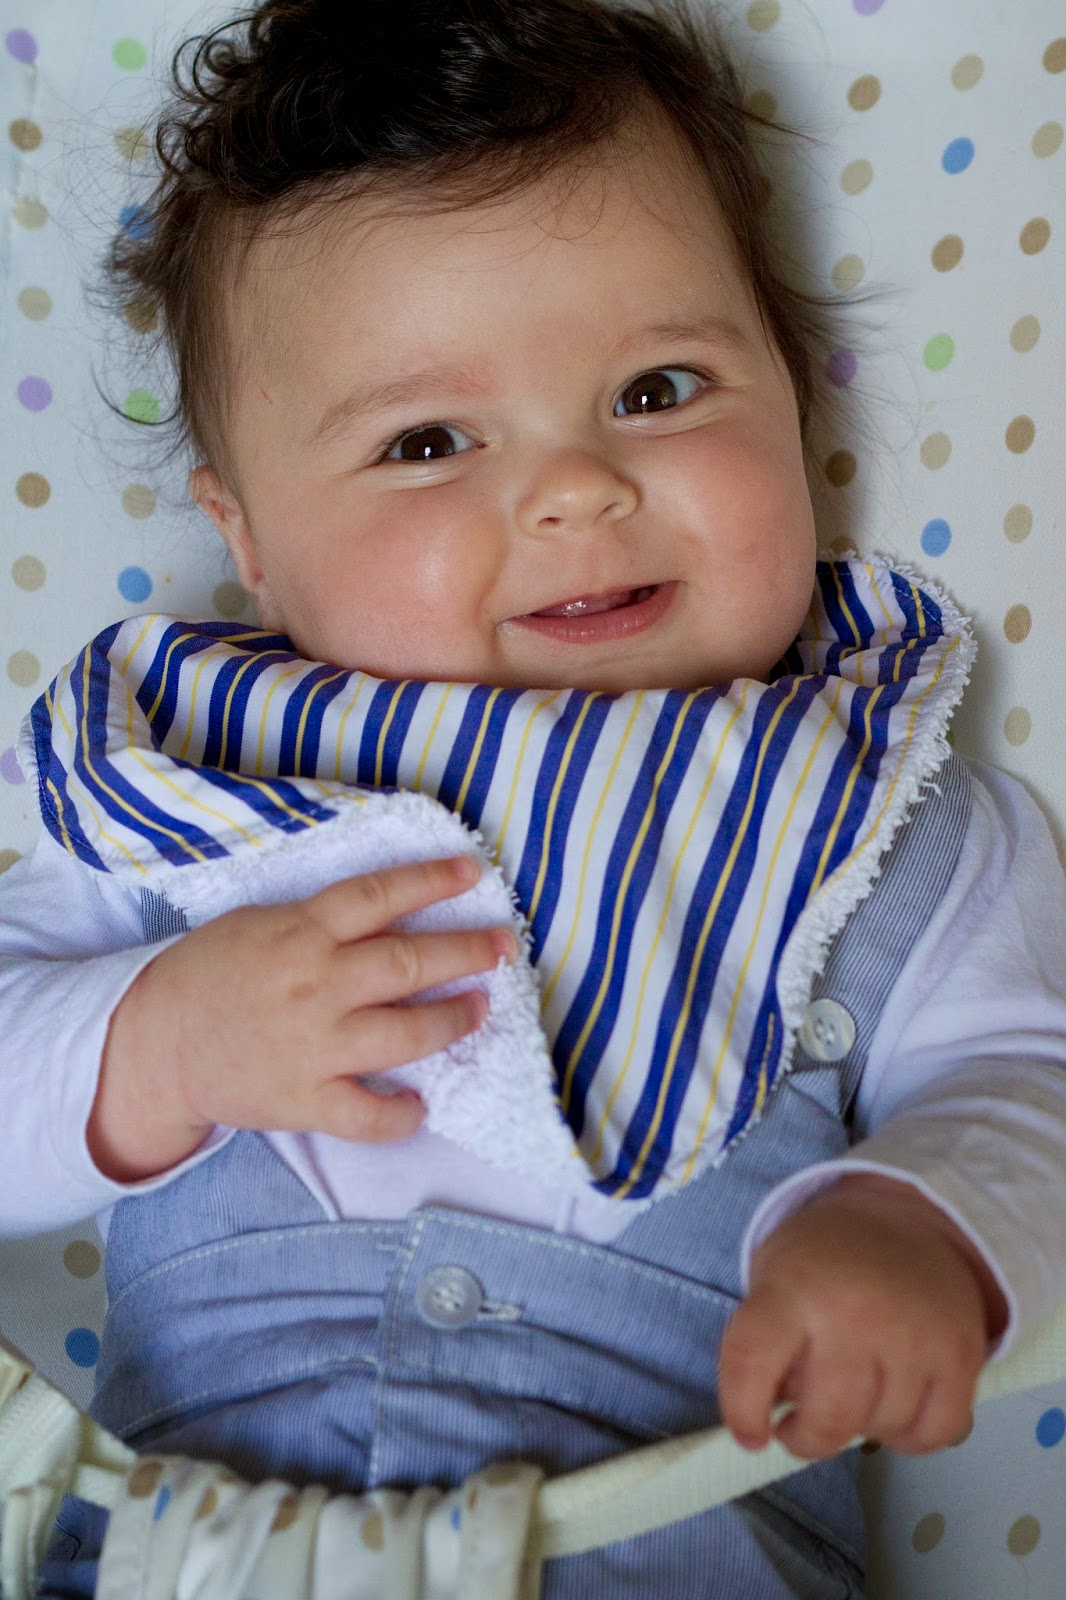
Como sabem, farto-me de aproveitar camisas de homem — um dia tenho de fazer um post com um apanhado de tudo aquilo que já fiz — porque os tecidos são excelentes e, muito francamente, de graça! Para fazer cada um destes calções usei apenas as costas e uma manga de cada camisa. Com o que sobrou, ainda consegui fazer uns quantos babetes para o Pedro.
Obrigada, Magda, pelo convite para participar na tua série! Para verem mais reciclagens criativas de um grupo de bloggers talentosas, não deixem de visitar o blog ao longo desta semana. E espreitem aquilo que a Maria João fez hoje!
Magda invited me to take part in her Refashion Week, along with a handful of other Portuguese bloggers. What was the first thing that occurred to me when I read her email? Upcycling shirts, of course!

It’s been hot around here and Rodrigo was in need of some cool pyjamas. Just like I did two years ago, I turned a bunch of old men’s shirts into pj bottoms, but this time I used a different pattern: Oliver + S Sunny Day Shorts.

It’s a free pattern but that doesn’t mean that it’s any less perfect that the other Oliver + S patterns. The only alterations I made were: 1- I French-seamed (is that a verb?) everything; 2- the front was sitting too high and that was causing some odd folds, so I lowered it a bit by cutting a soft rounded line across the front (I eyeballed this). I sewed size 4 for Rodrigo, who’s turning 3 next month. I started by sewing size 3 (not pictured here) but even though they were fine for now, I know that in 6 months time they’ll no longer fit (and he’ll need them for the Portuguese summer).

I find this type of sewing incredibly satisfying. I guess nowadays no-one sews in order to save money but this is one of those projects where you only consume thread, electricity and your time. And it feels great to see your children wearing comfortable, crisp and well-cut clothes that have been made using up recycled materials.

As you know, I’m always upcycling men’s shirts — I must to post a round-up of everything I’ve made so far — because they’re a source of great quality fabrics and, let’s be honest, it’s free fabric! To make each of these shorts I only used the back of the shirt and one sleeve. With the leftovers I made bibs for Pedro!

Thanks, Magda, for inviting me to play along with you. If you’d like to see what the other talented bloggers have created, don’t miss Magda’s blog updates this week. And check out what Maria João has come up with today!
(photos: © Constança Cabral)

Mulberry Tunic :: An Upcycled Men’s Shirt

(do avesso :: inside out)

Estou contentíssima com esta camisa de Verão que fiz para o Rodrigo. Ficou fresca, confortável e, simultaneamente, arranjadinha q.b. Ele também gostou!
1. O molde
Mulberry Tunic da Olga do blog Kid Approved. Este molde tem algumas variações: mangas curtas ou compridas, bolsos e um capuz. É um molde digital (quando o compramos, recebemos um ficheiro PDF por email) e vai dos 18 meses aos 12 anos.

2. A minha versão
Fiz a versão que gastava menos tecido (já vos vou dizer porquê): mangas curtas, sem bolsos nem capuz. Fiz as presilhas das mangas mais curtas (diminuí-lhes 2,5 cm no comprimento) e fiquei rendida às dobras das mangas, que são feitas de uma maneira muito engenhosa. O remate do colarinho não foi cortado em viés — mas sim num ângulo esquisito entre 45º e 90º, porque não havia tecido suficiente —, daí ter ficado um bocadinho ondulado (mas isto é um preciosismo… quase nem se nota, sobretudo porque o Rodrigo nunca está quieto!). Cosi os lados com costuras inglesas, o meu acabamento preferido.

3. O tamanho
Fiz o tamanho 3 anos para o Rodrigo, que vai fazer 3 anos daqui a um mês. Fica-lhe impecável, mesmo à medida.

4. O tecido
Reutilizei uma camisa fil-à-fil do meu pai, daí o tecido ter sido tão à conta! Era uma camisa clássica para usar com gravata, mas o colarinho já estava muito esgarçado e acho que já tinha sido virado uma vez. Como sabem, farto-me de aproveitar camisas de homem para tudo e mais alguma coisa, e o tecido desta era tão bom que tinha mesmo de ser utilizado para algo especial. Estas são as minhas reciclagens preferidas: aquelas em que se consegue tirar o máximo partido da peça original, mas o resultado não fica com ar de reaproveitamento. Os botões madrepérola vieram de outra camisa.

5. Notas finais
Devo confessar que hesitei um bocado antes de comprar este molde, porque aquela costura a meio ali à frente não me convencia… Percebo a razão porque ela existe: é uma maneira fácil de fazer uma carcela até meio, para dar à camisa um ar de túnica — e eu, como costureira autodidata e com pouco traquejo nesta arte da confecção, agradeço a intenção. Mas, como o molde ficou em saldos antes do Natal, resolvi arriscar. Ainda bem que o fiz! Gosto imenso do resultado, acho que a costura nem se nota e fartei-me de aprender com as instruções. Agora quero fazer uma versão de Outono com mangas curtas e capuz.
I’m really happy with this summer shirt I made for Rodrigo. It turned out great: cool, comfortable and not too dressy but not too casual either. He approves!

1. The pattern
Mulberry Tunic by Olga from the blog Kid Approved. This pattern offers a few variations: short or long sleeves, pockets and a hood. It’s a digital pattern (which means that you get a PDF file on your email inbox) and it’s sized from 18 months to 12 years.

2. My version
I made the version that used up less fabric (more on that later): short sleeves, no pockets and no hood. I made the sleeve tabs 1” shorter than the original ones and I was really pleased with the fold on the sleeves, it’s really clever. I didn’t manage to cut the tape for the collar on the bias because I didn’t have enough fabric — I was forced to cut it in a funny angle somewhere between 45º and 90º, and that’s why it doesn’t lay completely flat (but since Rodrigo never sits still, you’ll never notice it). I used French seams for the sides of the shirt.

3. The size
I made a size 3 for Rodrigo, who’s turning 3 next month. The fit is perfect.

4. The fabric
I upcycled a fil-a-fil shirt that used to belong to my father. It was one of those classic shirts to wear with a tie but the collar was getting old and I think it had already been turned once. As you know, I love breathing new life into old clothes and this shirt’s fabric was really high quality, so I had to use it to make something special. This is my favourite kind of recycling: where you’re able to make the most of the original piece but the result doesn’t look like “making do”. The shell buttons came from another shirt.

5. Final notes
I confess that I hesitated a bit before buying this pattern because of that front horizontal seam. I guess I know why it’s there: it makes the whole job of sewing the half placket a lot easier — and I, as a self-taught sewer and a beginner in the art of dressmaking, undoubtedly appreciate the intention. But when the pattern went on sale before Christmas, I decided to give it a go. Well, I’m glad I did! I love how the tunic turned out, the aforementioned seam doesn’t bother me at all and I learned a lot from Olga’s instructions. Now I want to make an autumn version with long sleeves and a hood.

(photos: © Constança Cabral)

Macaquinho de Verão :: Summer Romper

O Verão finalmente chegou à Nova Zelândia e eu quero aproveitar todos os momentos! A chegada do calor foi a desculpa perfeita para fazer um macaquinho para o Pedro. Apesar de o Pedro ter herdado toda a roupa do Rodrigo e não precisar de muita roupa nova, estou apostada em fazer-lhe algumas peças enquanto ele é bebé, porque agora sei como este primeiro ano passa depressa. Para além disso, sempre que sigo instruções sinto que aprendo alguma coisa, e isso é divertido e útil!
1. O molde
Style 4137, um molde de 1984 que encontrei numa loja de caridade ao pé de minha casa. Procurei referências a esta marca de moldes na internet mas não encontrei nada. As explicações são características dos moldes mais antigos: relativamente sucintas, a assumir conhecimentos prévios e a pedir acabamentos feitos à mão (não há um único pesponto à máquina neste fatinho). A única alteração que fiz foi acrescentar molas entre as pernas, para ser mais fácil mudar a fralda.
2. O tecido 
Um seersucker (crepon) que comprei no Armazém dos Linhos (uma loja de visita obrigatória no Porto: para além de uma enorme variedade de chitas portuguesas, tem muitos tecidos de confecção). Gosto imenso de ver bebés (rapazes e raparigas) vestidos de cinzento-claro, e nem hesitei quando vi este tecido à venda. O plano era fazer uns calções a condizer para o Rodrigo, mas não comprei tecido suficiente…

3. O tamanho
Estes moldes antigos normalmente só têm um tamanho (ao contrário dos moldes modernos, que incluem vários tamanhos num só envelope). Este tamanho é para 6 meses e fica mesmo à medida do Pedro, que acabou de fazer 5 meses.

4. Notas finais
Gosto muito deste modelo absolutamente intemporal e o molde é bastante bom. Como cá estamos no Verão, visto-o por cima de um body branco de mangas curtas ou de uma camisa, ou sem nada por baixo nos dias de muito calor. Se fosse Inverno, podê-lo-ia ter feito num tecido mais quente (uma fazenda fininha ou uma vaiela), para ser vestido por cima de uma camisola e de uns collants.

Summer is finally here and I intent to make the most of it! The arrival of warmer weather was the perfect excuse to whip up a little romper for Pedro. Even though Pedro has inherited all of Rodrigo’s clothes and isn’t in need of much else, I really want to sew a few pieces for him because now I know how quickly the first year goes by. In addition to that, every time I follow a pattern I learn something new, and that’s fun and useful!

1. The pattern
Style 4137, a pattern from 1984 that I found at a local charity shop. I searched online for information regarding this pattern company but found nothing about it. The instructions are typical of this older patterns, in that they are short, assume a lot of prior knowledge and require hand-finishing (there isn’t any topstitching on this romper). The only alteration I made was adding snaps for easier nappy changing.

2. The fabric
Gingham seersucker bought at Armazém dos Linhos (a fabric shop in Porto, Portugal, that mustn’t be missed as it’s full of traditional Portuguese fabrics and a nice selection of dressmaking materials). I love seeing babies (both boys and girls) dressed in light grey so I snapped up this print as soon as I laid eyes on it. The original plan was to make matching shorts for Rodrigo but unfortunately I didn’t buy enough fabric for that…

3. The size
These old patterns usually only come in one size (as opposed to modern sewing patterns that are multisized). This one is for 6 months and it fits Pedro (who’s just turned 5 months) perfectly.

4. Final notes
I love this timeless style for babies and this pattern is great. As it’s summer right now, Pedro will wear it over a white short-sleeved bodysuit or shirt, or — if it gets really hot — with nothing underneath. If it were winter I would have made it in a thicker fabric (either wool or viyella), to be worn over a wool cardigan and a pair of tights. 

(photos: © Constança Cabral)

Olá 2015! :: Hello 2015!

Bom ano para todos! Que 2015 nos traga muitas aventuras e momentos cheios de alegria. Cá estão os meus rapazes com as toilettes de ano novo, que só acabei no dia 1 à noite… para a semana escrevo sobre elas. Bom fim-de-semana!
Happy new year, everyone! May 2015 bring us all kinds of adventures and joyful moments. Here are my boys with their new year’s outfits, which I only finished sewing on the evening of the 1st… next week I’ll tell you all about them. Have a lovely weekend!

(photos: © Constança Cabral)

Shop Update :: Quilt Kits

Lembram-se dos quilt kits? É com grande alegria que vos digo que ontem actualizei a loja com mais de 20. De tudo aquilo que já vendi, os quilts kits são, de longe, o meu produto preferido (não contando com o livro, claro). Gosto de conjugar os tecidos, cortá-los, empacotá-los, ler os emails de quem os comprou, ver a execução e o produto final (1, 2, 3, 4). Gosto de pensar nos bebés que os irão usar e nas pessoas que, ao fazerem os quilts, ganharam confiança nos seus dotes de costura.
No fundo, tento fazer com os quilt kits o mesmo que tentei alcançar com o meu livro: encorajar quem se quer aventurar neste mundo do “feito à mão”. Descomplicar. Ajudar. Partilhar.
Se quiserem comprar um kit, espreitem a loja aqui.
Remember my quilt kits? I’m happy to tell you that yesterday I put up more than 20 kits for sale in my Etsy shop. Out of everything I’ve ever sold, the quilt kits remain my favourite product (apart from my book, of course). I love combining the fabrics, cutting them, putting together the package, reading the emails from the people who’ve bought them, watching their progress and the end result (1234). I like thinking about the babies who will get to use the quilts and I enjoy knowing that the people who’ve made them have gained confidence in their sewing skills.

Basically, what I’m trying to do with these quilt kits is the same as I tried to convey in my book: encourage whoever wants to venture into this world of handmade. Uncomplicate. Help. Share.

If you’d like to buy a kit for yourself or as a gift this Christmas, check out my shop here.
(photos: © Constança Cabral)

Shop Update :: Scrap Bags

A minha loja finalmente deixou de estar vazia! Tenho imensos retalhos e sei que nunca terei oportunidade de pô-los todos a uso, por isso resolvi partilhá-los convosco. Fiz 23 conjuntos diferentes e pu-los à venda aqui
My shop isn’t empty any more! I’ve put together 23 different scrap bags for you to play with. I love working with scraps but there’s no way I’ll ever have time to put them all to good use… so I thought I’d share them with you! They weigh 200 g (7 oz) each and they’re listed right here.

(photo: © Constança Cabral)

Acertar Triangles :: Trimming Triangles

Há quatro meses comecei a fazer um quilt de triângulos rectângulos.
Aproveitei quadrados que me sobraram dos quilt kits. Juntei-os dois a dois (direito com direito), tracei a diagonal e cosi duas linhas paralelas, ambas a 1/4 de polegada da dita diagonal. Cortei-os ao meio pela diagonal, engomei-os e fiquei com mais de 400 triângulos rectângulos.
E depois li numa série de blogs que tinha de acertar os ditos triângulos. E a minha mãe confirmou. É verdade que eles ficaram um bocado distorcidos depois de terem sido cosidos e engomados (tem a ver com o facto de as costuras serem cosidas no viés nos tecidos).
Mas esta história de acertá-los está a demorar taaanto tempo. Estou aborrecida. E algo desencorajada.
Enfim. Vou respirar fundo e acertar mais uns triângulos. Vai valer a pena! 
Four months ago I started making a half-square triangle quilt.

I took the leftover squares from my quilt kits, paired them right sides together, traced the diagonal and stitched two parallel lines, each 1/4” from that diagonal. I cut them in half following the diagonal, pressed them and ended up with over 400 half-square triangles.

And then I read on several blogs that I should square up those triangles. And my mother confirmed it. It’s true that they end up a bit crooked after all that sewing and pressing (it has to do with the fact that the fabrics are sewed on the bias).

But this trimming business is taking so looong. I’m feeling bored. And a bit discouraged.

Oh well. I’ll just take a deep breath and trim some more. It’ll be worth it in the end!

(photo: © Constança Cabral)

Pijamas a Condizer para Um Rapaz e o Seu Boneco :: Matching Pyjamas for a Boy and His Doll

Como todas as crianças, o Rodrigo está sempre a precisar de roupa nova. Calças de pijama valem mesmo a pena fazer em casa — casacos de pijama dão uma trabalheira e prefiro comprar-lhe t-shirts brancas de mangas compridas, mas fazer calças é rápido e barato. Mais uma vez, usei o molde Bedtime Story Pajamas da marca Oliver&S: o corte das calças é impecável, têm poucas costuras e ficam com um ar bastante profissional (acho que é o meu sétimo par).
O Rodrigo andava a pedir-me há que tempos para fazer roupa para o boneco Manel e, depois de uma série de fraldas às cores (hei-de mostrá-las aqui num dia destes), lembrei-me de lhe fazer um pijama a condizer. A Marta tinha-me mandado este link para calças e camisolas/vestidos de bonecas Waldorf e achei que seria ideal para transformar em pijama. O Manel tem 38 cm e retirei 1 cm ao comprimento das calças, bem como 1,5 cm ao molde da camisola (visto que o molde é para usar com o tecido dobrado, a camisola ficou com menos 3 cm de largura do que a original).
Nem imaginam como me diverti a fazer roupa para o boneco! Próximas peças: um par de jeans e uma camisola às riscas.
Just like every child, Rodrigo is in constant need of new clothes. Some of the things I find really worthwhile to make at home are pyjama bottoms — pj tops are too much work and I’d rather buy  him lots of long sleeve, white t-shirts, but the bottoms are quick and cheap to sew. Once again I used the Bedtime Story Pajamas pattern by Oliver + S: the cut is great, there aren’t too many seams and they look quite professional (I think this is my 7th pair).

Rodrigo has been asking me to make his doll Manel some clothes and after a number of nappies in every colour of the rainbow (one day I’ll show them here), I thought I’d make him matching pjs. Marta had sent me this link for Waldorf dolls trousers and tops/dresses and they were the perfect starting point for making pjs. Manuel is 38 cm so I shortened the trousers by 1 cm and took out 1,5 cm to the width of the top pattern (because the pattern is placed on the fold, the top turned out 3 cm less wide than the original one).

You can’t tell you how much fun I had sewing up these doll clothes! Next on my list: a pair of jeans and a stripey top.
(photos© Constança Cabral)

Animal Print


Alguns rapazes vibram com carros, dinossauros ou super-heróis — o Rodrigo é doido por animais. Música preferida? Old MacDonald Had a Farm. Brinquedos e livros preferidos? Animais e quintas. Desenhos animados preferidos? 101 Dálmatas e o Livro da Selva. 

Confesso que nunca fui grande fã de tecidos com bonecadas mas, quando comecei a ver as reacções do Rodrigo sempre que vê um tecido com animais, mudei de ideias. E, como ando numa de fazer almofadas cá para casa (uma desculpa óptima para experimentar várias técnicas de inserção de fechos éclair… depois partilharei as minhas conclusões), lembrei-me de fazer uma almofada nova para o quarto dele. Como seria de esperar, ele ficou todo contente com os animais!

PS. Para fazer a almofada usei um retalho de um tecido de decoração que encontrei há uns anos no Vidal, em Lisboa.

Some little boys love cars, dinosaurs or superheroes — Rodrigo is crazy about animals. Favourite song? Old MacDonald Had a Farm. Favourite books and toys? Everything that relates to animals and farms. Favourite cartoons? 101 Dalmatians and The Jungle Book.

I must say I’ve never been a huge fan of novelty prints but I’m starting to change my mind, mainly because of Rodrigo’s happiness whenever he sees a fabric with animals. Lately I’ve been making cushion covers for our home (a great way to experiment with different kind of techniques for inserting zips… more on that soon) and Rodrigo’s room was no exception. You should have seen his reaction when he saw his new cushion!

PS. The fabric I used to make the cushion was a home décor remnant I found some years ago in Vidal, a fabric shop in Lisbon.

(photos© Constança Cabral)

Bastidores :: Behind The Scenes

Para mim, folhear o meu livro tem significado reviver uma série de momentos. A noite em que, sentada à mesa de jantar de casa do meu pai, decidi o título. As fotografias tiradas em Inglaterra, entusiasmada com tantas descobertas ou farta de tanta chuva; as tiradas em Lisboa, cheia de calor e de pressa; e as que tirei na Nova Zelândia, ainda baralhada com uma mudança tão profunda e, mais tarde, durante o surto de produtividade que marcou as semanas que precederam a entrega do manuscrito. As dúvidas, os ensaios, as horas e horas passadas a escrever instruções. O Rodrigo e o Tiago quase sempre presentes. O entusiasmo e apoio dos meus pais e de algumas amigas em especial.

Este livro é a minha vida. Não comprei adereços especialmente para as produções, não houve sessões fotográficas em locais alugados, com modelos profissionais e um fotógrafo contratado. [Claro que um dia gostaria de experimentar tudo isso, não me interpretem mal.] Este livro foi feito com a prata de casa. De várias casas, aliás: a nossa casa em Inglaterra e agora a casa na Nova Zelândia, a casa da minha mãe, do meu pai e a verdadeira caverna de Ali Babá que é a casa dos meus avós. Modelos? Sou eu (em fotografias tiradas ao longo dos últimos anos), o Rodrigo (que nunca pensei que fosse incluído no livro), a Diana (que esteve cá em casa durante a recta final) e as mãos da minha mãe e da minha amiga Gracinha. Fotógrafo? O Tiago e eu, umas vezes em equipa (em que eu fazia o mise en place e o Tiago tirava a fotografia) e outras vezes só eu (fartei-me de trabalhar durante aqueles 2 meses que passei em Lisboa no ano passado).
Espero que o livro vos inspire a deitar mãos à obra!
PS. O livro pode ser comprado online aqui, com 10% de desconto e portes gratuitos. Este site também envia para fora de Portugal.

As I flip through my book I find my self experiencing again a number of moments. The evening when, sitting at my father’s dining table, I came up with the title. The photos taken in England, when I was feeling so invigorated by so many discoveries or whilst being fed up with so much rain. The ones I took in Lisbon, rushing everywhere and always battling with the heat. And the pictures taken in New Zealand, during that first year when I felt so overwhelmed by such a dramatic change and later on, during those weeks prior to my big deadline. The doubts, the trials, the hours upon hours of writing instructions. Rodrigo and Tiago almost always present. The excitement and support of my parents and some friends in particular.

This book is my life. I didn’t buy any props especially for the book nor did I have the luxury of a photo shoot in a wonderful location with professional models and a fancy photographer. [Don’t get me wrong: one day I’d love to experience all that!] This book was made with whatever I had at hand in my home. Actually, in several homes: the one in England, this one in New Zealand, my mother’s, father’s and grandparents’ (the latter being a true Ali Baba’s cave). Models? Myself (in pictures taken over the years), Rodrigo (who I never thought would be included in the book), Diana (who was here during that final stage) and the hands of my mother and of my friend Gracinha. Photographer? Tiago and me, sometimes working as a team (I’d set everything up and then he’d shoot it), other times me working by myself (I worked really hard during those 2 months I spent in Lisbon last year).

I hope the book inspires you to get things done!

PS. You can buy the book here with 10% discount. This website ships internationally. 

(photos© Constança Cabral)