Macaquinho de Verão :: Summer Romper

O Verão finalmente chegou à Nova Zelândia e eu quero aproveitar todos os momentos! A chegada do calor foi a desculpa perfeita para fazer um macaquinho para o Pedro. Apesar de o Pedro ter herdado toda a roupa do Rodrigo e não precisar de muita roupa nova, estou apostada em fazer-lhe algumas peças enquanto ele é bebé, porque agora sei como este primeiro ano passa depressa. Para além disso, sempre que sigo instruções sinto que aprendo alguma coisa, e isso é divertido e útil!
1. O molde
Style 4137, um molde de 1984 que encontrei numa loja de caridade ao pé de minha casa. Procurei referências a esta marca de moldes na internet mas não encontrei nada. As explicações são características dos moldes mais antigos: relativamente sucintas, a assumir conhecimentos prévios e a pedir acabamentos feitos à mão (não há um único pesponto à máquina neste fatinho). A única alteração que fiz foi acrescentar molas entre as pernas, para ser mais fácil mudar a fralda.
2. O tecido 
Um seersucker (crepon) que comprei no Armazém dos Linhos (uma loja de visita obrigatória no Porto: para além de uma enorme variedade de chitas portuguesas, tem muitos tecidos de confecção). Gosto imenso de ver bebés (rapazes e raparigas) vestidos de cinzento-claro, e nem hesitei quando vi este tecido à venda. O plano era fazer uns calções a condizer para o Rodrigo, mas não comprei tecido suficiente…

3. O tamanho
Estes moldes antigos normalmente só têm um tamanho (ao contrário dos moldes modernos, que incluem vários tamanhos num só envelope). Este tamanho é para 6 meses e fica mesmo à medida do Pedro, que acabou de fazer 5 meses.

4. Notas finais
Gosto muito deste modelo absolutamente intemporal e o molde é bastante bom. Como cá estamos no Verão, visto-o por cima de um body branco de mangas curtas ou de uma camisa, ou sem nada por baixo nos dias de muito calor. Se fosse Inverno, podê-lo-ia ter feito num tecido mais quente (uma fazenda fininha ou uma vaiela), para ser vestido por cima de uma camisola e de uns collants.

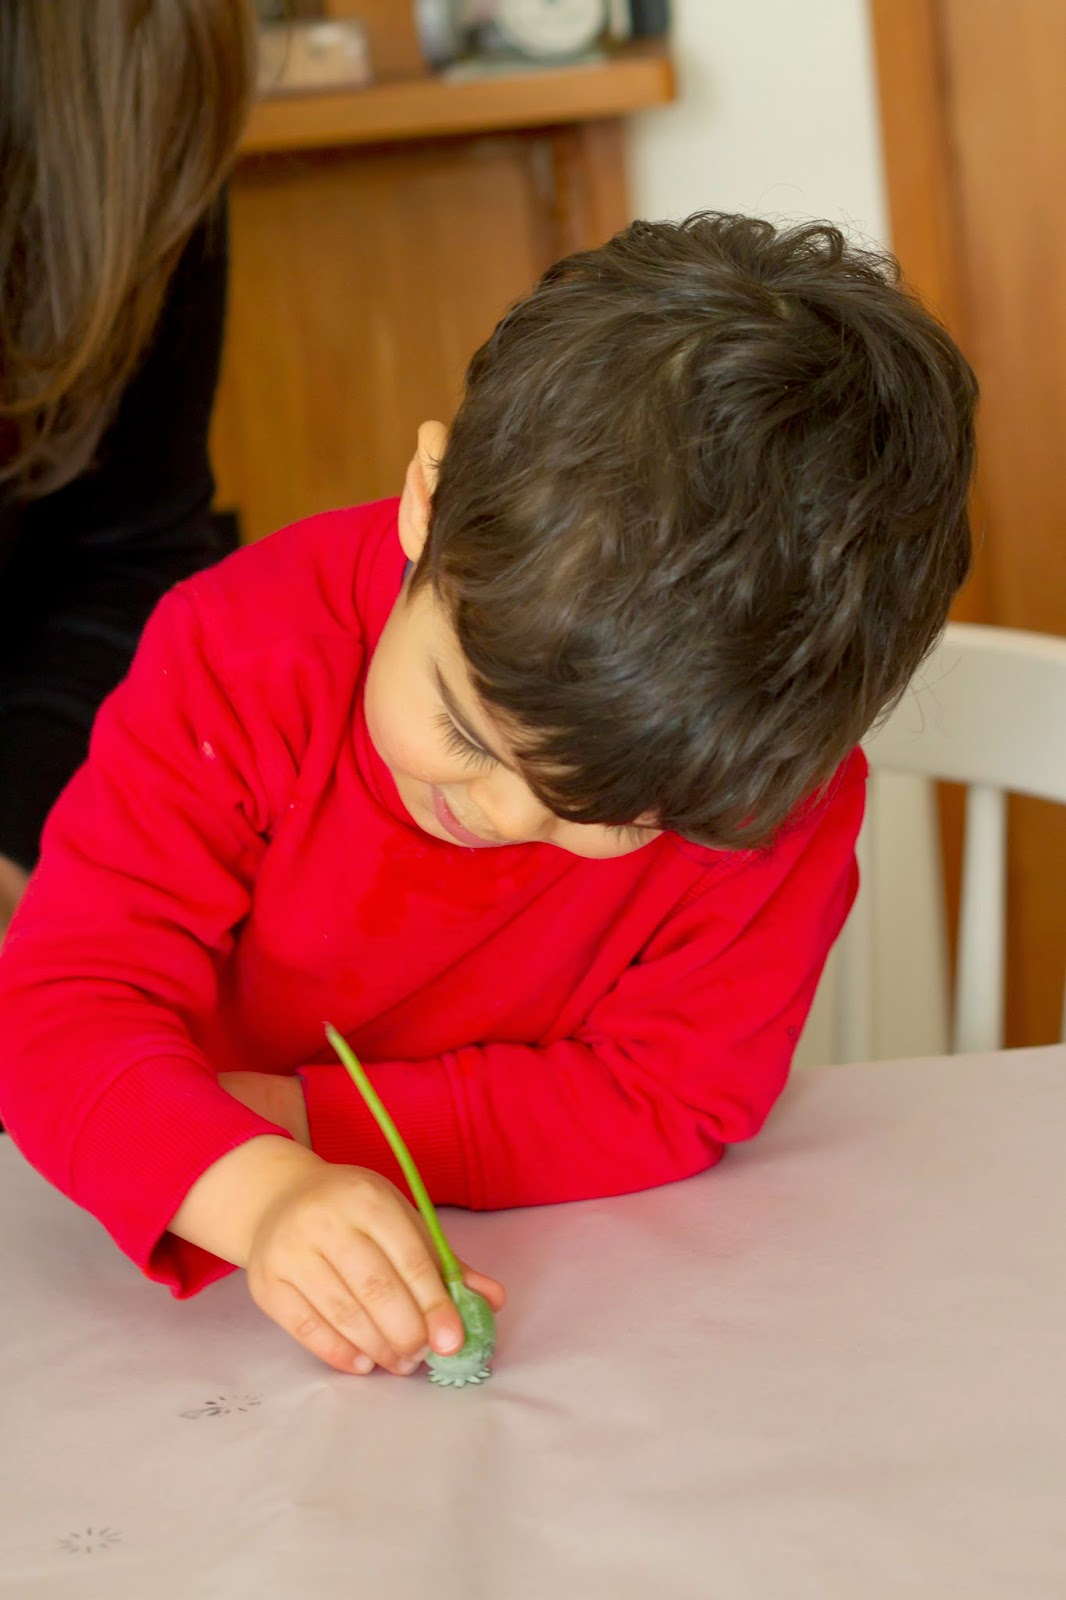
Summer is finally here and I intent to make the most of it! The arrival of warmer weather was the perfect excuse to whip up a little romper for Pedro. Even though Pedro has inherited all of Rodrigo’s clothes and isn’t in need of much else, I really want to sew a few pieces for him because now I know how quickly the first year goes by. In addition to that, every time I follow a pattern I learn something new, and that’s fun and useful!

1. The pattern
Style 4137, a pattern from 1984 that I found at a local charity shop. I searched online for information regarding this pattern company but found nothing about it. The instructions are typical of this older patterns, in that they are short, assume a lot of prior knowledge and require hand-finishing (there isn’t any topstitching on this romper). The only alteration I made was adding snaps for easier nappy changing.
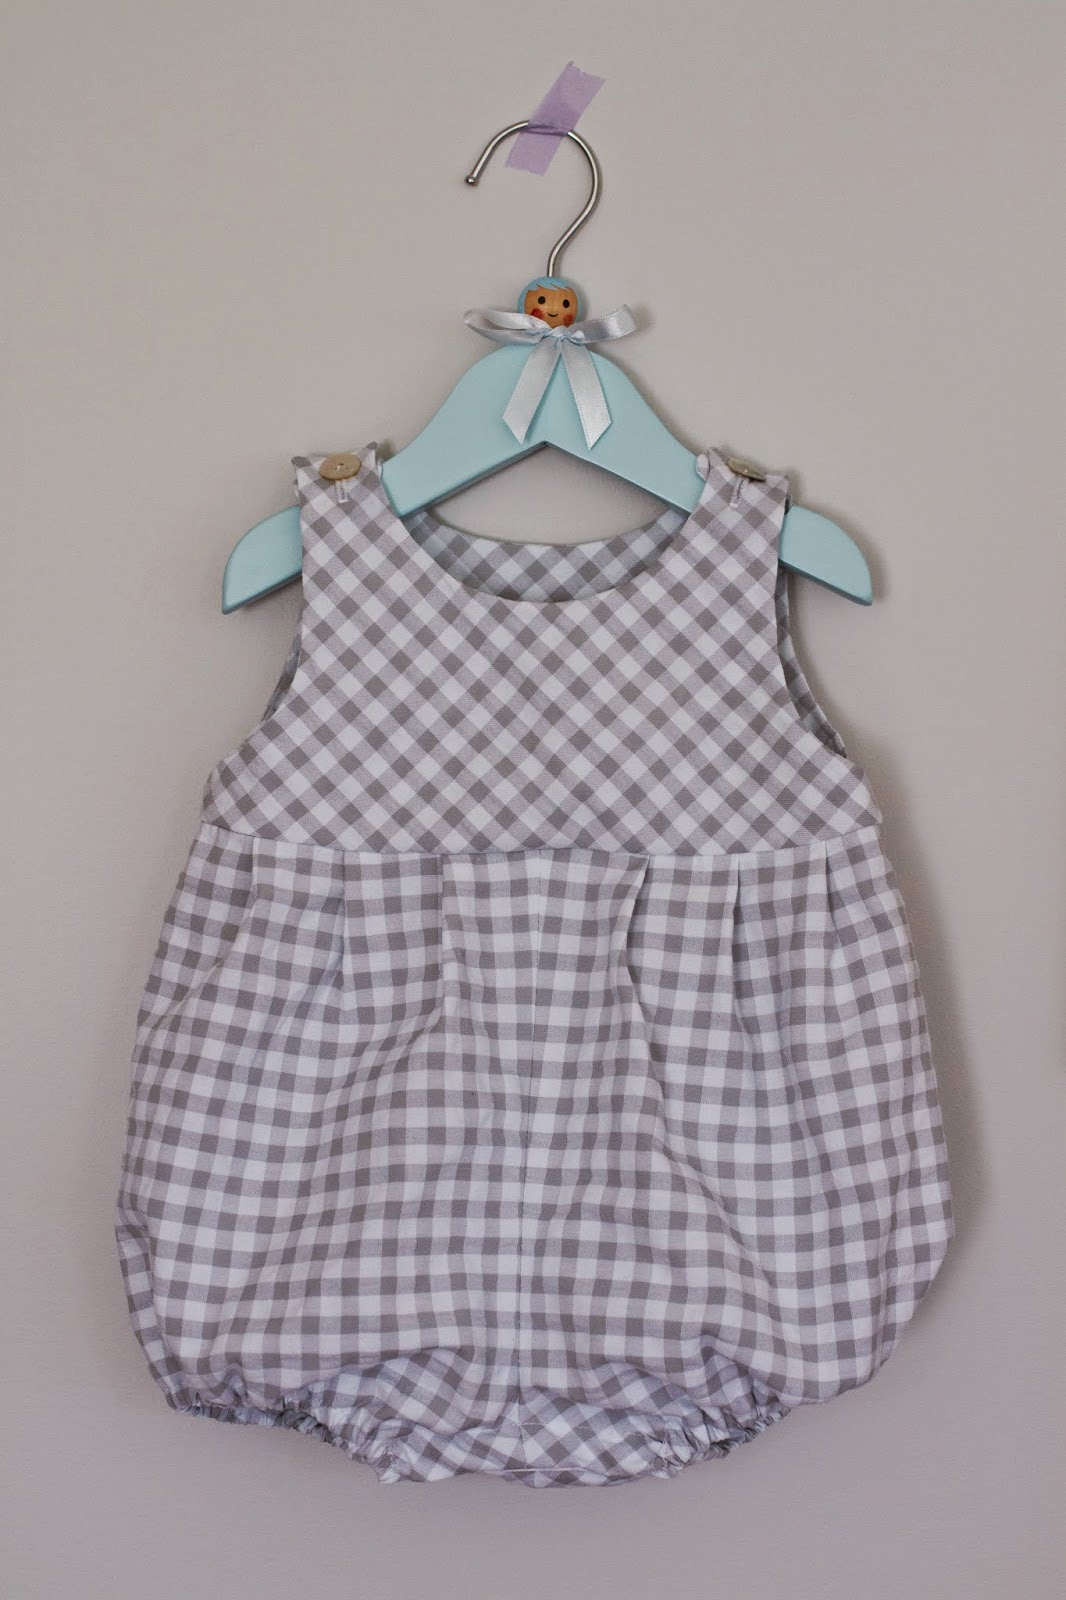
2. The fabric
Gingham seersucker bought at Armazém dos Linhos (a fabric shop in Porto, Portugal, that mustn’t be missed as it’s full of traditional Portuguese fabrics and a nice selection of dressmaking materials). I love seeing babies (both boys and girls) dressed in light grey so I snapped up this print as soon as I laid eyes on it. The original plan was to make matching shorts for Rodrigo but unfortunately I didn’t buy enough fabric for that…

3. The size
These old patterns usually only come in one size (as opposed to modern sewing patterns that are multisized). This one is for 6 months and it fits Pedro (who’s just turned 5 months) perfectly.

4. Final notes
I love this timeless style for babies and this pattern is great. As it’s summer right now, Pedro will wear it over a white short-sleeved bodysuit or shirt, or — if it gets really hot — with nothing underneath. If it were winter I would have made it in a thicker fabric (either wool or viyella), to be worn over a wool cardigan and a pair of tights. 

(photos: © Constança Cabral)

Olá 2015! :: Hello 2015!

Bom ano para todos! Que 2015 nos traga muitas aventuras e momentos cheios de alegria. Cá estão os meus rapazes com as toilettes de ano novo, que só acabei no dia 1 à noite… para a semana escrevo sobre elas. Bom fim-de-semana!
Happy new year, everyone! May 2015 bring us all kinds of adventures and joyful moments. Here are my boys with their new year’s outfits, which I only finished sewing on the evening of the 1st… next week I’ll tell you all about them. Have a lovely weekend!

(photos: © Constança Cabral)

Mesa de Natal :: Christmas Table

Ontem foi o solstício de Verão aqui no hemisfério sul. Visto que passamos o Natal no Verão, resolvi decorar a nossa mesa em conformidade com a época do ano. Este ano ainda não fomos à praia (tem chovido quase todos os dias) mas, quando em Fevereiro passado estivemos no Coromandel, trouxe um saco cheio de tesouros marinhos já a pensar na decoração do Natal de 2014.
A toalha é um lençol de linho grosso (com um monograma bordado a ponto de cruz encarnado!) que veio de casa do meu avô. No meio da mesa coloquei uma tira de serapilheira: limitei-me a cortar  uma tira com dois palmos no sentido da largura do tecido, e depois desfiei as bordas. Fiz três arranjos com flores, folhas e ervas aromáticas do nosso jardim e, em seguida, distribuí conchas, búzios, pinhas, pedras-pomes, esta espécie de pompons/ouriços de palha (que também encontrei na praia) e mais folhas do jardim. Terminei a decoração com uns quantos guizos de Natal em branco. Por fim, pus a mesa com o nosso serviço bom e com o faqueiro de todos os dias. Mas esqueci-me dos copos…!
Yesterday was Midsummer in the Southern Hemisphere. Since we celebrate Christmas during summertime, I’ve decided to decorate our table in conformity with the season. This year we haven’t been to the beach yet (it’s been raining almost every day) but when we were in the Coromandel in February I collected a bag full of beach treasures, already thinking ahead about Christmas decorations.

The tablecloth is an old linen sheet (with a cross-stitched red monogram!) that I inherited from my  late grandfather. Across the table I placed a table runner I made by simply cutting a strip of hessian (burlap) and unraveling the long edges of the material. I whipped up three small flower arrangements with things I cut from my garden: some flowers, a few seed pods, variegated foliage and a generous amount of rosemary. Then I distributed the maritime elements: shells, conches, pinecones, pumice and these amazing straw pompoms. I added in a bit of foliage to keep things fresh. I brought some Christmas cheer to the table by scattering a few white rattles amongst the beachy objects. Finally I laid the table with my “special” dinner set and our everyday flatware. But I seem to have ignored the glasses…!
(photos: © Constança Cabral)

Coroa de Feijoa :: Feijoa Wreath

Lembram-se da coroa com limpa-garrafas do ano passado? Este ano escolhi ramos de feijoa em flor (aquele fruto que só descobri na Nova Zelândia…. podem ler mais sobre feijoas aqui).
No meu livro tenho explicações passo-a-passo sobre como construir uma coroa deste género — é algo  bastante simples mas com grande impacto.

O Natal está à porta e eu ainda tenho imensa coisa por fazer… e vocês? Têm tudo sob controlo?

Remember the bottle brush wreath I made last year? Well, this year I chose feijoa blossoms and leaves (feijoa is a fruit I only discovered here in NZ… you can read more about it here).

In my book I’ve got step by step instructions and photos on how to make a wreath like this one — it’s a very simple project but one with a big impact.

Christmas is around the corner and I’ve still got so much to do… what about you? Everything under control?

(photos: © Constança Cabral)

Biscoitos de Natal :: Christmas Biscuits

O Rodrigo gosta muito de brincar com as formas das bolachas e andava há que tempos a pedir-me para as pormos a uso. Andei à procura de receitas com massa boa para cortar com formas (nem todas resultam bem, sobretudo depois de cozidas) e acabei por experimentar esta da Nigella. Ela própria comenta que é difícil encontrar uma receita que resulte em bolachas simultaneamente firmes e saborosas… e a verdade é que estas não sabem a muito. Não são enjoativas (algumas receitas deste género sabem demasiado a farinha ou a manteiga), mas ficariam melhores com um bocado de raspa de limão ou de laranja.
Quando as bolachas saíram do forno, furei-as com uma palhinha. Depois de frias, o Rodrigo e eu decorámo-las com uma pasta de icing sugar e água. Por fim, passei um cordel encarnado e branco para as poder pendurar na árvore… mas acabei por não conseguir pendurar nenhuma porque desapareceram num instante!
Rodrigo enjoys playing with the biscuit cutters we’ve got lying around the kitchen and keeps asking me to use them. I went looking for a good recipe for butter cut-out biscuits and ended up using this one by Nigella. As she says, it’s hard to find a recipe that produces both tasty and perfectly formed biscuits… and I must say these are a bit bland. They’re not too floury or buttery, I’ll admit to that, but I think they could be improved by adding a bit of lemon or orange zest to the batter.

When the biscuits came out of the oven I made one hole in each using a paper straw. Once they had cooled down, Rodrigo and I decorated them with a mixture of icing sugar and water. Then I threaded them with string so that we could hang them on the tree… but that never happened because the biscuits were gone in a flash!
(photos: © Constança Cabral)

Embrulho #4 :: Gift Wrapping #4

Mais uma ideia para carimbar papel de embrulho: tinta acrílica e uma rolha. Acreditam que tive de comprar uma rolha para este projecto? As garrafas de vinho neozelandês são todas de enroscar… não tenho uma única rolha no fundo das gavetas da minha cozinha!
O processo é simples: com um rolo espalha-se um bocado de tinta numa superfície lisa (eu usei papel vegetal de cozinha, mas uma placa de vidro teria sido ideal), usa-se a rolha como carimbo, deixa-se secar, faz-se o embrulho e termina-se com um bocado de fio de norte (também conhecido como fio de linho ou cânhamo).
Aqui fica uma sugestão para fazer com as crianças durante as férias de Natal!
Here’s another idea for stamping gift wrap: acrylic paint and a cork stopper. I actually had to buy a cork stopper for this project — I think every southern European will understand the bizarreness of this situation… buy a cork stopper? One usually has loads of them lying around the kitchen! But not in New Zealand: wine bottles here have screw caps!

Anyway, the process is dead simple: you just put a small amount of paint on your palette (glass would have been ideal but I have none so I used a piece of kitchen parchment papel instead), roll a brayer over it and use the cork stopper to stamp the paper (newsprint in my case). Let it dry, wrap the present and finish with some flax twine.

This could be a great activity to make with children during the Christmas holidays!
(photos: © Constança Cabral)

Embrulho #3 :: Gift Wrapping #3

Estampar papel-jornal com cabeças de papoila é a ideia de hoje. No nosso jardim temos bastantes papoilas-dormideiras espontâneas. Já usei muitas vezes tanto as flores como as cabeças em arranjos, e um dia, quando as estava a cortar, olhei com atenção para a parte de cima das cabeças e fiquei cheia de vontade de experimentar usá-las como carimbo. E não é que funciona? Basta escolher as cabeças que têm superfícies planas (dependendo do estado de maturação, assim são curvas ou planas) e usá-las como um carimbo normal. Adoro o efeito e estou cheia de vontade de as estampar em tecidos!
Stamping newsprint with poppy heads is today’s idea. In our garden we’ve got lots of opium poppies that keep self seeding all over the place. I’ve used both the flowers and the heads in flower arrangements but when I was cutting one the other day, the thought of using the heads as stamps occurred to me. And it works! You just need to pick the latest heads (they can be flat or slightly curved depending on their ripeness) and use them just like you’d use a regular stamp. I’m in love with this look and I can’t wait to stamp them on fabric!

(photos: © Constança Cabral)

Embrulho #2 :: Gift Wrapping #2

Hoje mostro-vos uma das minhas ferramentas preferidas: um carimbo! Há uns anos encontrei este carimbo numa loja de província inglesa, daquelas que já são raras hoje em dia e que vendem tudo e mais alguma coisa, desde baldes de plástico a pasta de dentes. O carimbo não é de muito boa qualidade (há versões bem melhores nas grandes papelarias), mas permite um sem-fim de utilizações.
Neste caso compus a data do dia de Natal, mas também pode ser utilizado para um presente de anos, carimbando no papel de embrulho a data de nascimento do destinatário. O papel que utilizei foi papel-jornal — há uns tempos comprei uma resma para os desenhos do Rodrigo e para as minhas experiências com carimbos e afins.
Escolhi uma fita às riscas encarnadas e brancas, mas poderia ter usado fio de norte, para uma versão minimalista, ou com uma fita de cetim larga numa cor flash, para um embrulho verdadeiramente festivo.
Today I bring one one of my favourite tools: a stamp! A few years ago I found this date stamp at an English old-fashioned general store, one of those shops that are rare nowadays and that sell everything under the sun, from pails to tooth paste. This particular stamp isn’t top quality (there are  much better versions for sale in big stationery shops) but it allows an infinite number of possibilities.

In this case I stamped the date of this year’s Christmas day but you could also use it for birthday presents by turning the numbers so you could stamp the recipient’s date of birth. The paper I used was newsprint — I had bought a big ream of newsprint paper for Rodrigo’s art attempts and for my own experiments.

I chose a red and white stripey ribbon for this particular gift, but you could use flax twine for a minimalist look or a wide satin ribbon in flashy colours for a truly festive present.

(photos: © Constança Cabral)

Embrulho #1 :: Gift Wrapping #1

Ao longo dos próximos dias vou mostrar-vos como estou a embrulhar os presentes cá em casa.

A ideia de hoje: um desenho/pintura infantil + um bocado de cordel + um botão a condizer.

Over the next few days I’m going to show you how I’m wrapping my presents this year.

Today’s tip: children’s art + a piece of twine + one matching button.

(photo: © Constança Cabral)