Transformar uma Camisa de Bebé num Body :: Baby Shirt Bodysuit Tutorial

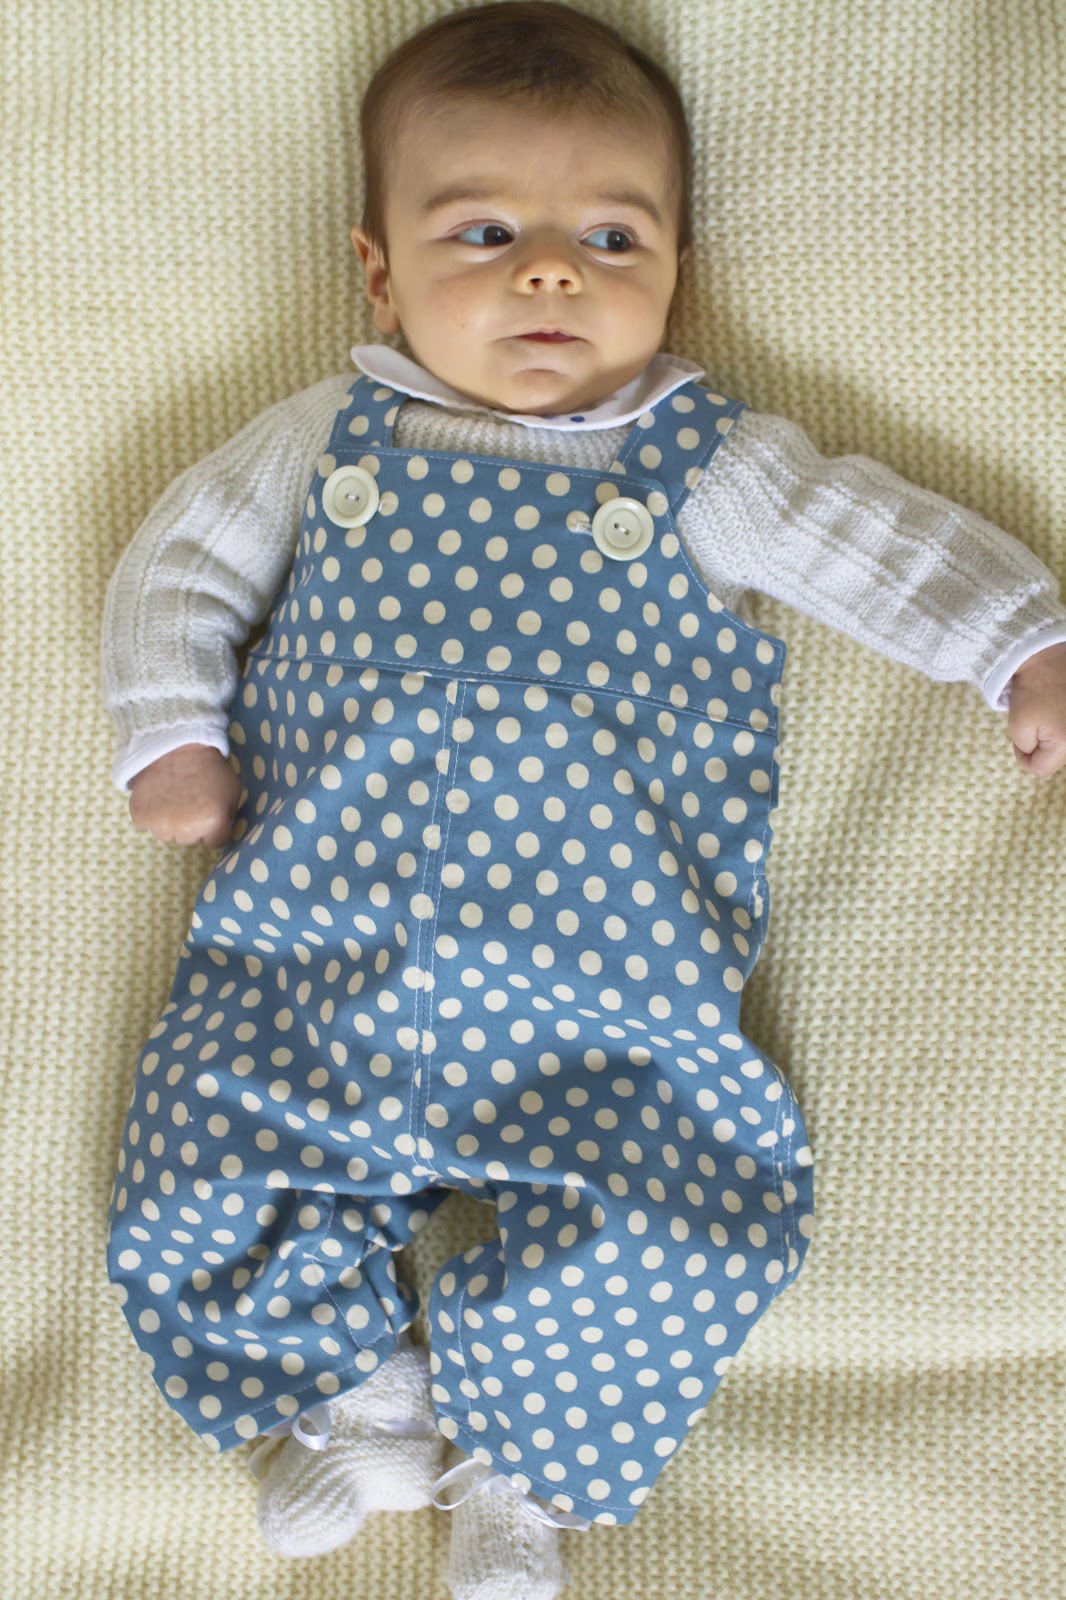
Como houve quem me tivesse pedido mais pormenores sobre a camisa-body de bebé, resolvi fotografar o processo para que vejam como é fácil e rápido transformar uma camisa de bebé num 
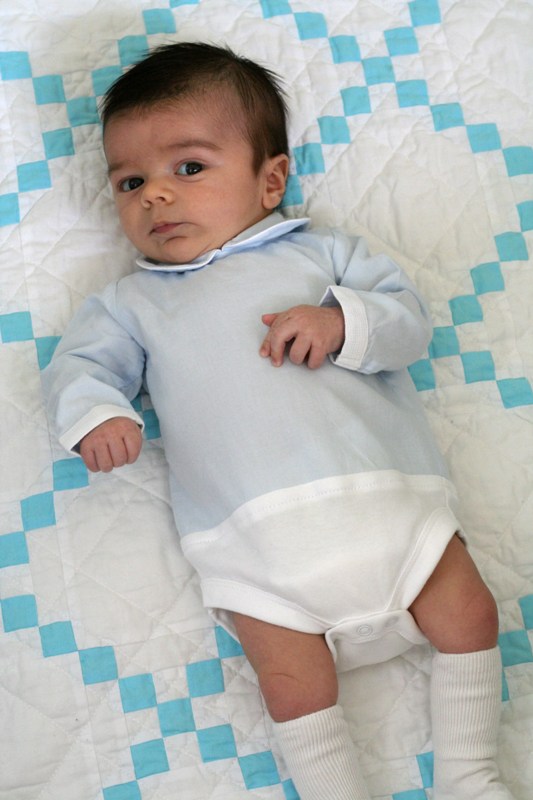
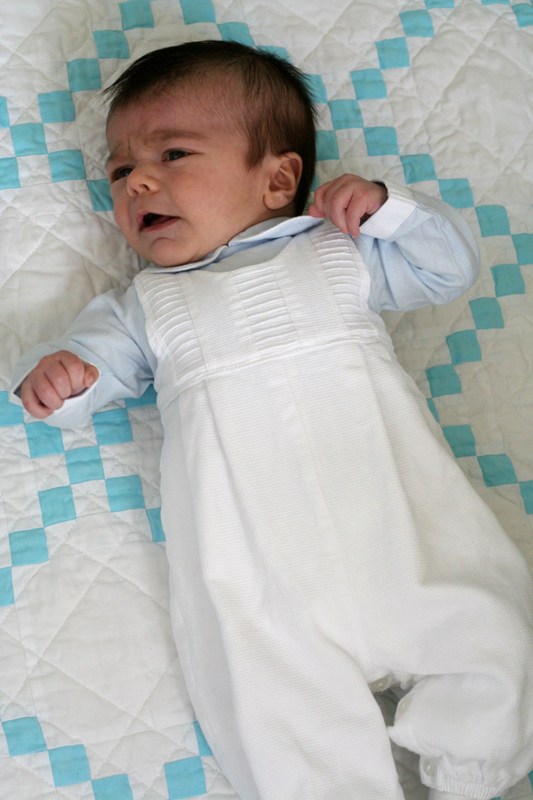
body. Esta é uma solução muito simples para que a barriga e as costas dos bebés nunca fiquem destapadas por muito que se mexam ou quando lhes pegamos ao colo.
Material
1 camisa de bebé em algodão já feita
1 body de malha (compre um que seja barato)
linha branca
agulha para máquina, tamanho 100
alfinetes
máquina de costura
Since some of you have asked me for more details on how to make a baby shirt-bodysuit, I’ve decided to write up a quick tutorial so you can see how simple it is to do it. This is a great solution to keep babies’ tummies and backs always safely tucked in their clothes, no matter how much they wriggle around.

You’ll need
1 cotton baby shirt (already made)
1 cotton jersey bodysuit (buy a cheap one)
white thread
needle for sewing machine (size 100)
pins
sewing machine
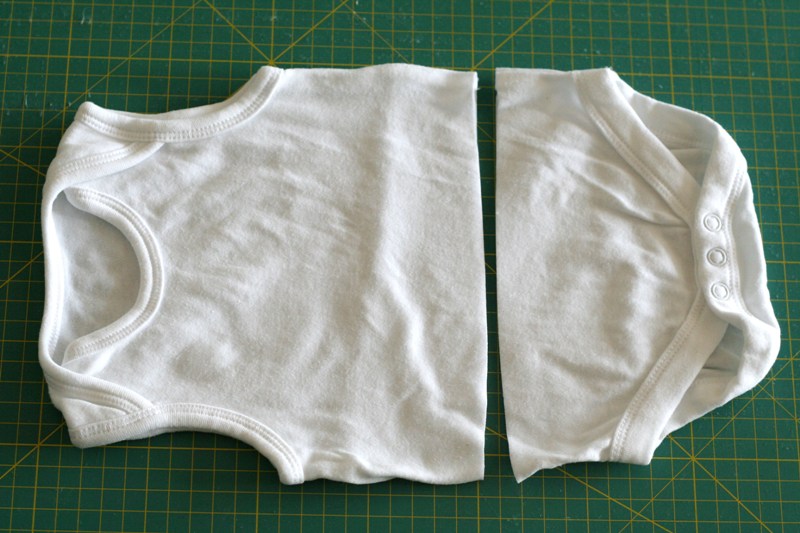
1. Meça o tronco do bebé (do pescoço até entre as pernas, fralda incluída) e a esse valor acrescente 5 cm. Agora meça a altura da camisa. Subtraia o valor da camisa ao valor total (tronco do bebé + 5 cm). Use o resultado como medida para cortar a parte de baixo do body.
1. Mesure the lenght of your baby’s body, from the neck all through between the legs, nappy included. Add 5 cm. Now measure the length of the shirt. Subtract this from the first number (baby’s body + 5 cm). Use this result as the measurement to cut the bottom part of the bodysuit.

2. Feche a parte de trás da camisa com uns quantos pontos cosidos à máquina.
2. Close the shirt at the back by sewing a few stitches with your sewing machine.

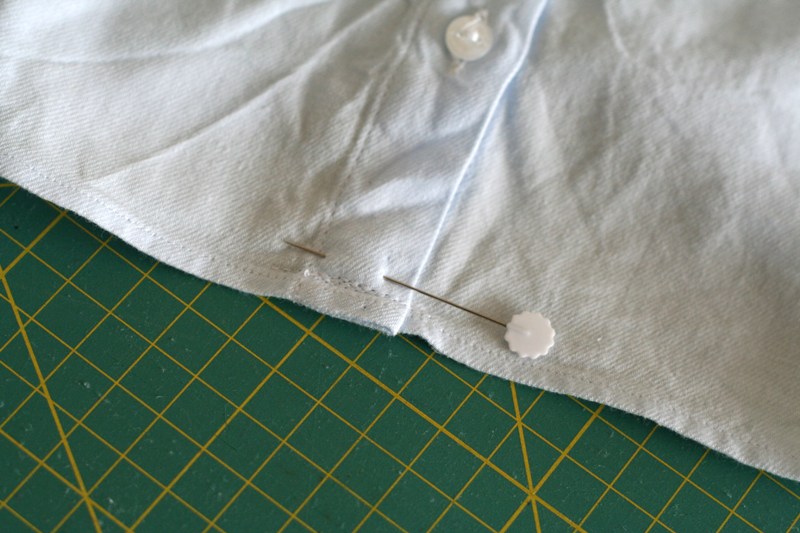
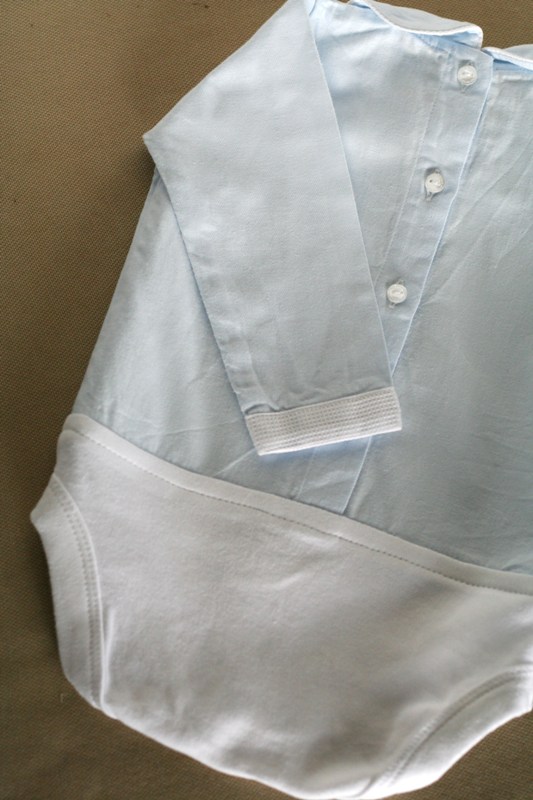
3. Coloque um alfinete a meio da bainha da camisa, tanto na parte da frente como na de trás. Faça o mesmo à parte de baixo do body.
3. Place a pin to the middle front of the finished edge of the shirt and then to the middle back. Do the same thing to the raw edge of the bodysuit.

4. Direito contra direito, alinhe os alfinetes que acabou de colocar e as costuras do meio e prenda com alfinetes. Vá colocando alfinetes a toda a volta (é capaz de ter de esticar ligeiramente o body).
4. Right sides together, match the pins and the side seams of the shirt and bodysuit. Pin all the way around them (you might have to slightly stretch the bodysuit).

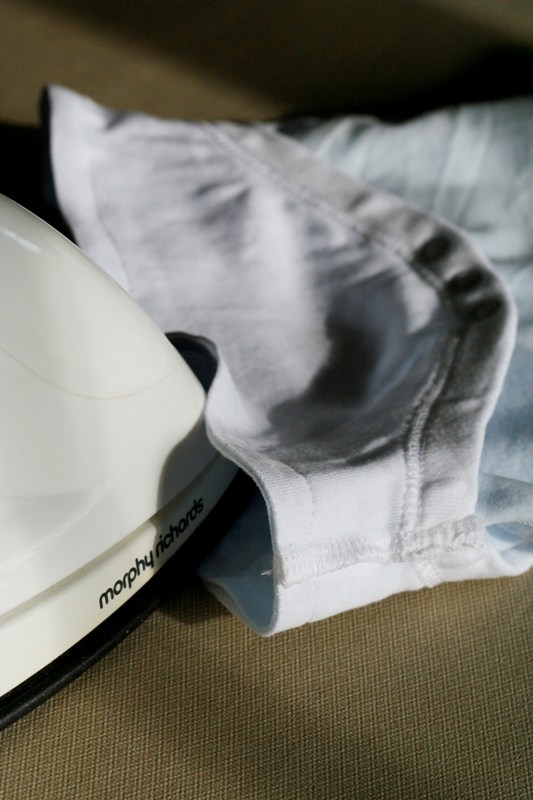
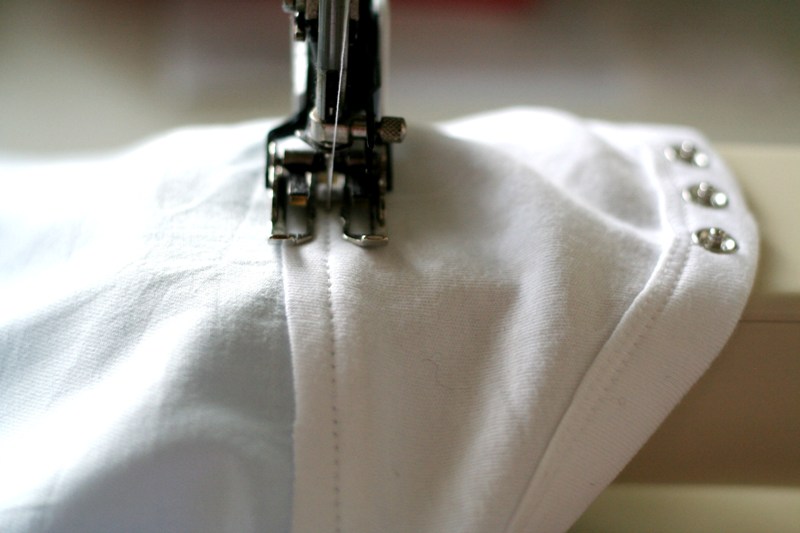
5. Cosa à máquina usando 1 cm como margem de costura. Passe a costura (ainda do avesso) a ferro para estabilizar os pontos.
5. Stitch all the way around using a 1 cm seam allowance. Press the seam as sewn (still on the wrong side of the fabrics) in order to stabilise the stitches.
6. Já do direito, engome a costura no sentido do body.
6. On right side of fabrics, press the seam towards the bodysuit.

7. Pesponte a 0,5 cm da costura.
7. Topstitch 0.5 cm from seam.

8. Já está!
8. That’s it!


(photos: Constança Cabral)

Kids Clothes Week Challenge :: Simplicity 2459

O Kids Clothes Week Challenge foi o empurrão de que eu precisava para começar e acabar umas jardineiras de bebé. O molde que utilizei foi o Simplicity 2459, o tecido é do Kaffe Fassett e o Rodrigo parece um palhacinho com estes botões enormes… mas não é suposto a roupa de criança ser minimamente divertida?
Kids Clothes Week Challenge was a much-needed push for me to actually sew a pair of baby dungarees from start to finish. The pattern is Simplicity 2459, the fabric is by Kaffe Fassett and the (huge) buttons make Rodrigo look like a little clown… but aren’t children’s clothes supposed to be fun?

(photos: Tiago Cabral)

Kids Clothes Week Challenge

Hoje começa mais uma edição do Kids Clothes Week Challenge. O desafio, que decorre durante esta semana, consiste em reservar pelo menos uma hora de cada dia para fazer roupa para (as nossas) crianças. A anfitriã é a Meg do blog Elsie Marley. Eu vou participar — e vocês?
Today starts another Kids Clothes Week Challenge. The challenge takes place during this week and urges you to sew something for (your) kids for at least an hour a day. The host is Meg from the Elsie Marley blog. I’m taking part — how about you?

(photo: Tiago Cabral)

Boneca + Mini Quilt :: Doll + Mini Quilt

A nossa sobrinha mais nova fez um ano e este foi o presente que lhe oferecemos: uma boneca e um pequeno quilt para a boneca, tudo feito por mim. A boneca foi feita a partir do molde da Poppy Doll; o corpo é em flanela tingida com chá, o cabelo é parte de uma camisola de lã feltrada e o vestido de inspiração sixties tem entremeios de lençol que encontrei em casa da minha avó. Quanto ao quilt, o modelo é uma espécie de coin quilt e fi-lo rapidamente, sem muitos cuidados nem precisões, com sobras de quilt kits em tons de cor-de-rosa. O sashing branco é um resto de um lençol de linho comprado numa brocante na Bélgica.
Our youngest niece has recently turned one and this was the present we gave her: a doll and a mini quilt, both handmade by me. The doll was made using the Poppy Doll pattern; for her body I used tea dyed flannel, for her hair a piece of a felted sweater and for her sixties-inspired dress some bits of lace I found at my grandmother’s. As for the quilt, it’s sort of a coin quilt and I made it improv-style, without thinking too much, with remnants from quilt kits in shades of pink. The white sashing comes from an old linen sheet I bought some years ago in a Belgian brocante.

(photos: Tiago Cabral)

WIP :: Doll + Doll Quilt

A casa está desarrumada, o frigorífico vazio, tenho dezenas de emails para ler e responder. Numa corrida contra o tempo, tenho aproveitado todos os minutos livres dos últimos dois dias para acabar uma boneca que comecei há meses. E, como as bonecas merecem estar confortáveis, decidi fazer também um quilt à medida dela. Espero poder mostrar os resultados muito em breve!
The house is a mess, the fridge is empty, I’ve got dozens of emails to read and reply. In a race against time I’ve been using every free minute I have to finish a doll I started many months ago. And because every doll deserves a fair dose of comfort, I’ve decided to make her a mini quilt too. I’m hoping to share with you the results very soon!

(photos: Constança Cabral)

Calças à Marinheiro :: Sailor Trousers

Acontece-me muitas vezes começar com uma ideia para um projecto de costura e, devido à falta de materiais ou a um engano a meio caminho, o resultado ser bastanto diferente do plano original. Nessas ocasiões tenho de puxar pela cabeça e sair da minha zona de conforto, o que significa que, muitas vezes, o resultado até acaba por ser mais giro do que a ideia inicial.
Com estas calças passou-se exactamente isso. Comecei por querer fazer umas calças de balão em piqué branco para o Rodrigo. Como base usei o molde para bloomer do livro Intemporels pour Bébés e alonguei-o mas, quando me preparava para cortar o tecido, apercebi-me de que não havia suficiente. Virei-me então para um bocado de tecido azul de decoração (que nem sabia que existia no meu armário) e cortei as calças, mas achei que iriam ficar com pouca graça… Lembrei-me então de transformá-las numas calças à marinheiro com pinças pespontadas à frente, elástico atrás e botões em madrepérola. Talvez tenham ficado demasiado largas, mas ele fica com um ar divertido!
Sometimes I’ll start with an idea for a sewing project but the outcome turns out to be very different from the original plan… this usually happens because I’m short on materials or even due to some sort of mistake along the way. In those cases I must get out of my comfort zone and be more inventive, and often the end result is superior than the original idea.

That’s precisely what happened with these trousers. I started by wanting to sew a pair of white piqué Aladdin trousers for Rodrigo. Using the Intemporels pour Bébés pattern for bloomers, I lengthened it and then I saw that I didn’t have enough fabric for it. I raided my stash and found a piece of home décor material in a nice shade of blue and I cut the trousers, only to come to the conclusion that they were going to be a bit plain… So I decided to turn them into a pair of sailor trousers with darts in the front, elastic in the back and four mother-of-pearl buttons. They may be a bit too wide but he looks quite amusing!

(photos: Tiago Cabral)

Manequim :: Dressmaker’s Dummy

Andava há anos à procura de um manequim antigo — são difíceis de encontrar em relativo bom estado e a um preço razoável. Então não é que a minha querida senhoria me diz que tem dois guardados no sótão? Emprestou-me este e ando toda contente com esta nova ajudante de costura.
(o saco de praia/passeio/cidade está disponível aqui vendido)
For years I’ve looked for an old dressmaker’s dummy — they’re hard to find in a reasonable condition and for a decent price. Who could have guessed that my lovely landlady had two stored away in her attic? She let me borrow this one and I’m really pleased with with my new sewing partner.

(the beach/city bag is available here sold)

(photos: Tiago Cabral)

Quilt Kits in Progress

Têm-me perguntado se haverá mais quilt kits disponíveis no futuro — a resposta é sim! Mas de momento tenho alguma dificuldade em estar em pé muitas horas (e acreditem que engomar e cortar tecidos leva mesmo muito tempo), por isso os kits só estarão na loja daqui a umas semanas… 
You’ve been asking me whether I’ll have any more quilt kits available in the near future — the answer is yes! But presently I’m unable to stand on my feet for long stretches of time (and believe me when I say that ironing and cutting fabric takes a very long time), which means that the shop will only be updated in a few weeks time…

(photos: Constança Cabral)