Outrageous Chocolate Cookies

Apesar da onda de batidos verdes que assola a internet (eu estou cada vez mais curiosa, mas ainda não tive coragem para aderir à loucura), cá em casa continuo a fazer muitos doces, daqueles cheios de glúten, açúcar refinado e manteiga*. A maior parte das experiências não chega a ver a luz do dia aqui no blog — só quero partilhar convosco receitas realmente deliciosas — mas tenho que deixar aqui uma menção a estas bolachas de chocolate da Martha Stewart. São decadentes e absolutamente viciantes, com uma textura quase de brownie. Usei uma mistura de chocolate preto e Green & Black’s Maya Gold (laranja e especiarias) porque era aquilo que havia na minha despensa, e acho que vou voltar a usar esta combinação! Experimentem fazê-las: a receita está aqui.
* temos a sorte de não haver alergias alimentares cá em casa… quanto a dietas, pensaremos nisso daqui a uns meses.
Despite the current green juice mania (I’m getting increasingly curious but I’m still lacking the moral and physical courage to join in), I keep on baking a lot of things that are packed with gluten, refined sugar and butter*. Most of my experiments never see the light of day here on the blog — I’ve pledged to only share delicious recipes with you — but I feel I must mention these Martha Stewart chocolate cookies. They’re decadent and highly addictive, almost brownie-like. I used a mixture of dark chocolate and Green & Black’s Maya Gold (hints of orange and spices) because that was all I had in the cupboard and I like this combination! Here’s the recipe in case you want to try them.

* we’re lucky enough not to have any food allergies in our family… as for dieting, I’ll think about that in a few months’ time.

(photo© Constança Cabral)

Dia-a-Dia :: Everyday Life


Confesso que não sou daquelas mães com imensas ideias para actividades originais e ultra-didácticas para as crianças. Mas gosto de envolver o Rodrigo nas tarefas do dia-a-dia: fazer pão e bolos, tirar a loiça da máquina, regar o jardim, arrancar papel de parede…
Claro que há imprevistos (como, por exemplo, quando ele arranca uma planta ou lambe a tarteira acabada de untar), fica sempre tudo caótico e as operações levam o dobro do tempo. Mas para mim isto é que faz sentido! Não há receitas perfeitas para criar os filhos e, no meu caso, quanto mais o Rodrigo cresce, mais fácil (e giro) o dia-a-dia se torna. Veremos como será com um bebé à mistura!
I confess I’m not one of those mothers that are always producing lots of original and super didactic activities for their children. But I like involving Rodrigo in daily chores: making bread and cakes, unloading the dishwasher, watering the garden, ripping out wallpaper…
 
Of course this creates chaos, he’ll often do unpredictable things (like pulling out a plant or licking a buttered pie dish) and tasks will take much longer to complete. But it makes sense to me! There are no perfect recipes for parenting and, in my case, it’s getting easier (and more fun) the more he grows up. Let’s see how things will work out with a baby on top of all this!
 
(photos© Constança Cabral)

À Escala :: A Matter of Scale

Um bolo grande para nós, um bolo pequeno para ele. À escala, pois claro!

(o bolo de iogurte e limão é um bolo bom, fácil e versátil que faço muitas vezes — ver aqui, por exemplo —; a receita vem neste livro)


A large cake for us, a small cake for him. A matter of scale, indeed!

(I make this lemon and yoghurt cake a lot because it’s easy, it tastes good and it’s quite versatile — see here, for example —; the recipe comes from this book)

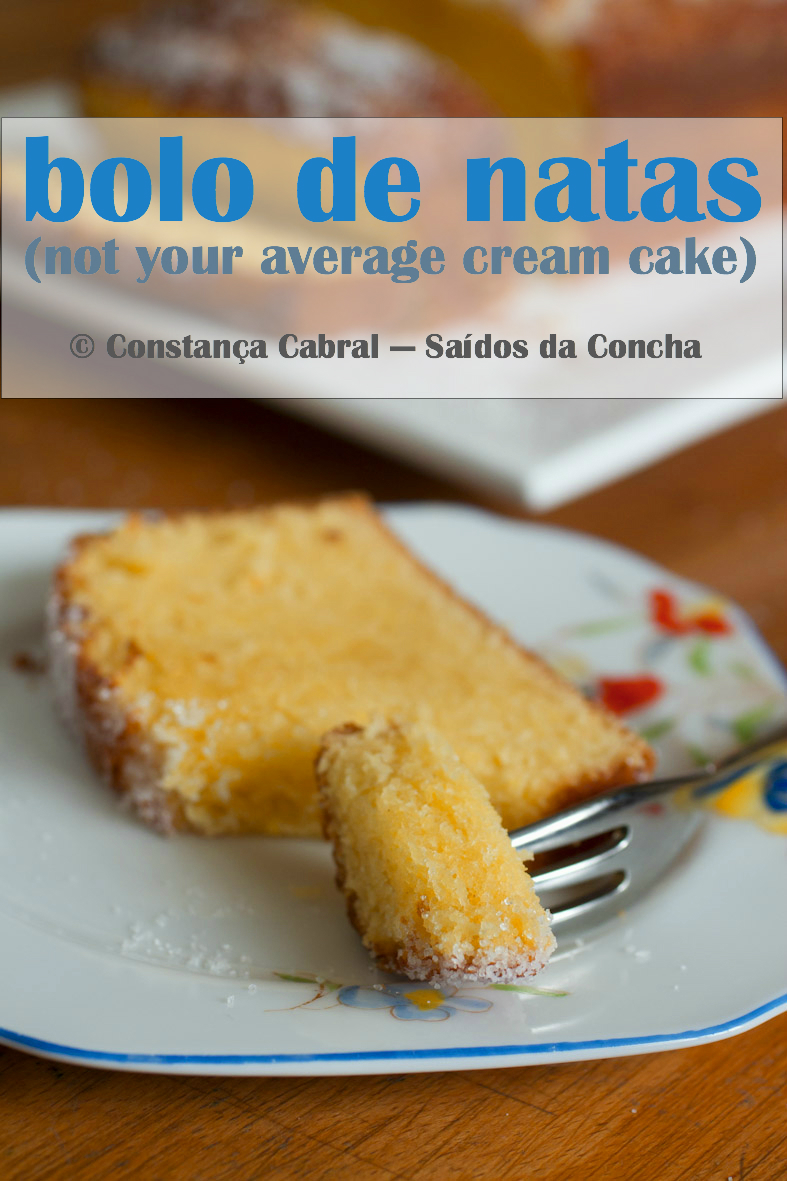
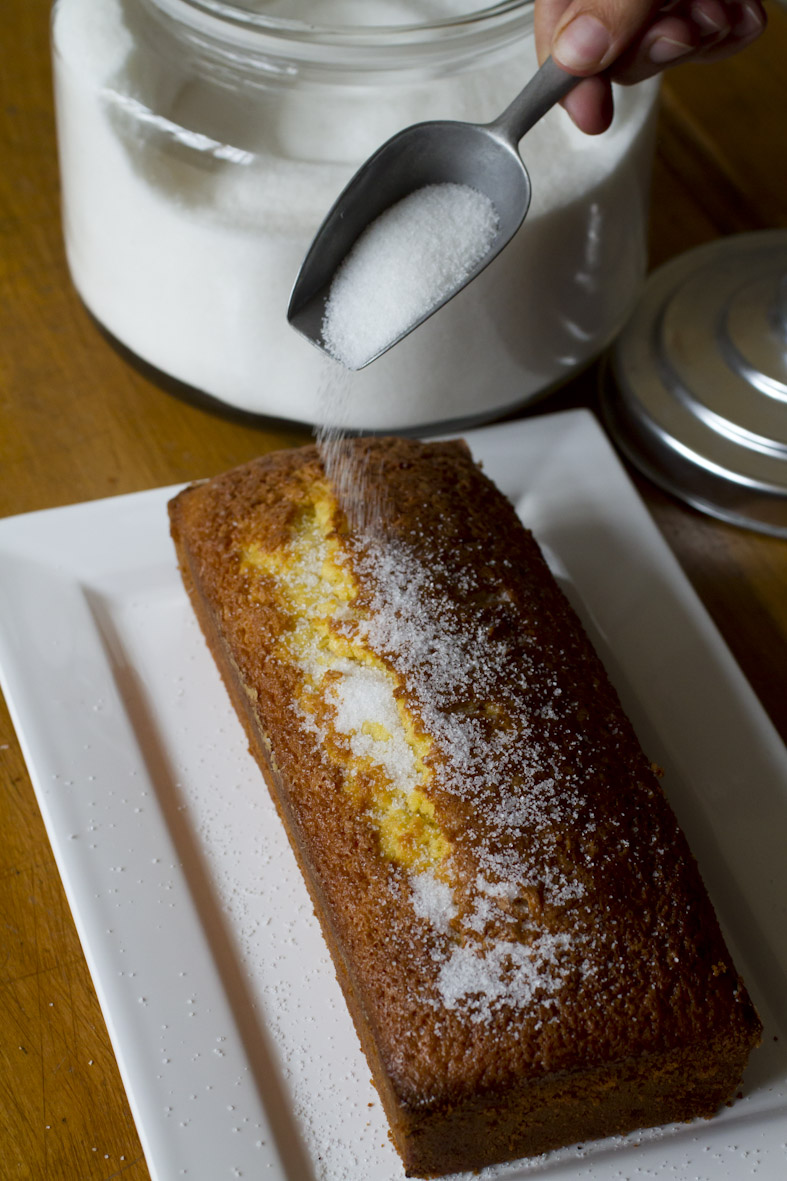
(photo: © Constança Cabral)

Madalenas Mergulhadas em Chocolate :: Chocolate Dipped Madeleines

Há uns tempos demos um jantar cá em casa e lembrei-me de fazer madalenas para oferecer com o café. Usei a minha receita como base, mas fiz algumas alterações: substituí a raspa de limão por laranja e, em vez de polvilhá-las com icing sugar, resolvi mergulhá-las em chocolate preto.
O chocolate que uso para cozinhar é exactamente o mesmo que gosto de comer no dia-a-dia — com isto quero dizer que não utilizo chocolate de culinária género Pantagruel nos meus bolos e sobremesas. (Chocolates de luxo são outro assunto — hoje estou a falar do chocolate que como diariamente.) Isto não é uma questão de snobeira, mas sim de gosto: quanto melhores os ingredientes, melhor o produto final. As marcas que prefiro variam conforme o país onde estou: em Inglaterra e aqui na NZ uso Green & Black’s 70% Cocoa (o Maya Gold também é óptimo), na Bélgica adoro o Côte d’Or Fondant Puur e em Portugal compro o melhor chocolate preto que houver nas prateleiras do supermercado (imagino que já haja mais variedade do que há 3 ou 4 anos por isso não vou indicar marcas).
Agora, nem toda a gente gosta de chocolate preto. É intenso e ligeiramente amargo, sim. E não é muito doce. Daí a reacção do Rodrigo às madalenas: entusiasmo inicial, surpresa quando deu a primeira dentada e decepção no final. Mas nós adultos adorámos!
Some weeks ago we gave a dinner party and I decided to bake madeleines to offer along with coffee. I used my basic recipe but made a few alterations: I substituted grated lemon rind for orange and instead of dusting them with icing sugar, I dipped them in dark chocolate.

The chocolate I use in the kitchen is exactly the same one I eat — by this I mean that I don’t buy cooking chocolate. (Luxury chocolate is a whole different ball game — today I’m talking about everyday chocolate.) This isn’t a question of snobbery, it’s simply a matter of taste: the better the ingredients, the better the outcome. The brands of chocolate I prefer depend on the country I’m in: in England and here in NZ I use Green & Black’s 70% Cocoa (Maya Gold is also great), in Belgium I love Côte d’Or Fondant Puur and in Portugal I buy the best I can find on the supermarket shelf. 

Now, not everybody likes dark chocolate. It’s intense and a bit bitter. It’s not too sweet. Hence Rodrigo’s reaction when he tasted the madeleines: he was excited at first, a bit surprised after the first bite and disappointed in the end. But us adults loved them!

(photos: © Constança Cabral)

Geleia Novamente :: Jelly Yet Again

A primeira vez que fiz doce, jurei para nunca mais. Esterilizar os frascos, não deixar queimar o preparado, atingir o ponto certo, selar tudo hermeticamente, pasteurizar… foi uma grande confusão. Mesmo assim, o doce ficou bom e a partir daí as compotas do supermercado passaram a saber a pouco. Comprei alguns utensílios (sou da opinião de que tudo na vida é mais fácil com o equipamento certo), li muito sobre o assunto (hei-de mostrar-vos os meus livros preferidos) e simplesmente experimentei.
Há uns tempos fiz geleia de amora e maçã silvestre (acho que é esta a tradução de crab apple, mas corrijam-me se não for bem isto). As amoras tinham-nos sido dadas no fim do Verão e congelei-as logo, as maçãs foram compradas numa quermesse de igreja. Esta é uma das minhas geleias preferidas e, apesar de demorar dois dias (é preciso coar a fruta), é muito fácil de fazer. O método é sempre o mesmo: esterilizar os frascos, cozer a fruta, coar, acrescentar o açúcar, ferver furiosamente o preparado até que se atinja o ponto certo, enfrascar, pasteurizar. Um dia hei-de escrever tudo com muitos pormenores mas, por agora, vejam aqui a receita-base do Pantagruel.
The first time I tried making jam I swore I’d never do it again. Sterilising the jars, being careful not to let it burn, testing for setting, pasteurising… what a great fuss it all was. Nevertheless, the jam turned out fine and supermarket jam just never tasted the same. I was hooked. I bought some equipment (I’m of the opinion that everything in life is easier with the right kit), read a lot on the subject (I’ll tell you about my favourite preserving books in another post) and just got on with it.

Some weeks ago I made blackberry and crab apple jelly. The blackberries were given to us in late summer and I immediately froze them and the crab apples were bought at a church sale. This is one of my favourite jellies and although it takes two days for it to be ready, it’s very simple to make. The method is always the same: you sterilise the jars, boil the fruit, strain it, add the sugar, boil furiously until you reach setting point, pour into jars and pasteurise them. One day I’ll write about it in detail but not today because at the moment my hands and feet are absolutely frozen (these old houses without central heating are only fit for tough people and I’m still rather soft).
(photos: © Constança Cabral)

Bolachas com Pepitas de Chocolate :: Chocolate Chip Cookies

Há receitas que faço dúzias de vezes e que saem sempre bem. Já tinha falado aqui nestas bolachas com pepitas de chocolate mas volto a dar o link da receita. Experimentem-nas e nunca mais conseguirão comer as compradas no supermercado!
PS. O Rodrigo não está sempre a comer doces, apesar de parecer… aliás, mal viu a taça de porridge (o lanche habitual) começou aos gritos e não quis saber mais das bolachas! O casaco foi feito pela minha mãe segundo um modelo deste livro.

There are those recipes I keep using over and over again because they always work. I’ve already told you about these chocolate chip cookies but here’s the link again. Give them a try and never again will you be able to eat the ones from the supermarket!

PS. I realise it may look as though Rodrigo is constantly eating sweets but I assure you that’s not the case… in fact, as soon as he saw his porridge bowl he started screaming for it and didn’t care about the biscuits anymore! The cardigan was knitted by my mother using a pattern from this book.

(photos: © Constança Cabral)

Bolo de Natas :: (Not Your Average) Cream Cake

[scroll down for English]

Este é o bolo da minha infância. O bolo que havia sempre em casa da minha avó, o bolo que a minha mãe fazia tantas vezes, o primeiro bolo que fiz sozinha (lembro-me bem dessa manhã de sábado… por minha alta recreação resolvi envolver a farinha com as mãos — em vez de usar uma colher de pau ou vara de arames — para que ficasse sem grumos… resultou, mas não voltei a fazê-lo!).

O nome “bolo de natas” não é especialmente apelativo, eu sei… uma pessoa imagina logo um bolo carregado de chantilly e não este bolo simples, perfeito para um lanche (é excelente acompanhado de leite com chocolate), tão despretensiosamente delicioso. É fácil e rápido de fazer — aqui fica a receita da minha avó:

Bolo de Natas

200 ml de natas
250g de açúcar
3 ovos inteiros
raspa de 1 limão
150 g de farinha peneirada
1 pitada de fermento para bolos

Aquecer o forno a 180ºC.
Untar e enfarinhar uma forma (nós gostamos daquelas rectangulares de bolo inglês).
Bater as natas com o açúcar e a raspa de limão.
Juntar os ovos inteiros, um a um, e ir batendo.
Juntar a farinha com o fermento aos poucos e envolver (não bater muito).
Deitar na forma.
Pôr no forno e deixar cozer cerca de meia-hora (como todos os fornos são diferentes, é importante ir vigiando a cozedura — não deixar cozer demasiado, sob pena de o bolo ficar sequíssimo).
Esperar 10 minutos e desenformar.
Polvilhar com açúcar (parece desnecessário mas a sério que fica melhor).

PS. O Rodrigo provou e gostou. A camisola foi tricotada pela minha mãe segundo este modelo.

This is the cake of my childhood. Seriously, I was brought up on this “cream cake”. There was always one at my granny’s, my mother baked it often and it was the first cake I ever made on my own (I remember that Saturday morning… I reckoned it would be better to fold in the flour using my hands instead of a wooden spoon or a wisk. It worked fine but I’ve never done it again).
 

I realise the name “cream cake” can be deceptive. This is not a cake covered in cream, it’s a cake where cream is used instead of butter or oil or buttermilk or… well, you get the picture. It’s such a simple, quick, unpretentious, delicious cake: it’s especially good for afternoon tea paired with a glass of cold chocolate milk (or a cup of hot chocolate in winter). Here’s my granny’s recipe:
 

(Not Your Average) Cream Cake
 
200 ml single cream
250g caster sugar
zest of 1 lemon
3 eggs
150g plain flour
1 teaspoon baking powder
 

Pre-heat the oven to 180ºC.
Grease and flour a rectangular cake tin.
Beat the cream with the sugar and the lemon zest.
Add in the eggs, one at the time, beating them until they’re fully incorporated into the batter.
Fold in the flour (with the baking powder mixed in) but be careful not to overmix.
Pour the batter into the tin and place it in the oven.
Bake for approx. half an hour (all ovens tend to be different so this is just an indication — start testing as soon as the kitchen smells like cake). Do not overbake or it will be too dry.
Take it out of the oven and wait 10 minutes before removing the cake from the tin.
Dust with caster sugar (this may seem unnecessary but it does improve the cake).
 

PS. Rodrigo fully approved it. His jersey was hand-knit by my mother using this pattern.
 
(photos: ©Constança Cabral)

Curd de Maracujá :: Passion Fruit Curd

Obrigada por todas as sugestões de receitas com maracujás — quem me dera tê-las visto mais cedo! Mas para o ano já sei. Experimentei fazer curd de maracujá conforme esta receita — não ficou mau, mas poderia ter ficado melhor (acho que o problema foi eu não ter usado todas as sementes… segui o conselho do Tiago, que não foi tão sensato como habitualmente). Tenho de experimentar a receita da Nigella (que nunca nos deixa ficar mal, não é verdade?). 
Tenho comprado uma série de frascos antigos nas lojas de caridade aqui da zona. Visto que muitos deles não têm tampas, tapei-os com celofane como se fazia antigamente. E não é que resulta? 
(uma pequena chamada de atenção: como o curd leva ovos, tem de ser guardado no frigorífico e não na despensa) 
Thank you for all your suggestions regarding the use of passion fruit  — I just wish I saw them sooner! Next year then. I made passion fruit curd using this recipe — but it didn’t turn out as good as I wished (I think the problem was that I left out most of the seeds. Why? Because Tiago told me so). Next time I’ll use Nigella’s recipe (she never lets us down, does she?).

I’ve been buying a lot of old jars from local charity shops, I just can’t resist them. Since many of them haven’t got any lids, I used the time-honoured method of closing them with cellophane — and it works!

(quick note: because the curd has got eggs in it, it should be stored in the fridge, not the pantry)

(photo: Tiago Cabral)

Maracujás :: Passion Fruit

Temos a sorte de ter um jardim que, para além de muitas flores, dá também alguns frutos. Os preferidos do Rodrigo são os maracujás!
We’re lucky enough to have an established garden with lots of flowers and some fruits. Rodrigo loves picking and eating passion fruit!

(photos: Tiago Cabral)

Ainda a Marmelada :: Quince Paste Again

Estou a adorar ler os vossos comentários ao post sobre a marmelada, obrigada! É incrível como coisas tão simples com marmelada mexem tanto connosco e fazem lembrar mães e avós, momentos bons de infância, enfim. É por estas e por outras que me entusiasma ir partilhando convosco aquilo que vou fazendo!
Eu nunca vi marmelada a ser feita (consta que a minha avó Mimi também fazia, mas infelizmente não cheguei a conhecê-la —  a minha prima Inês é que é capaz de ter assistido ao processo). Um dos meus sonhos é um dia estar numa grande cozinha a aprender a fazer doces e conservas com quem os faz há muito tempo e sempre os viu fazer (os meus sonhos são sempre bastante elaborados e, quando penso nessa cozinha, imagino logo uma cozinha antiga num solar minhoto, ou numa casa beirã, ou num monte alentejano… com uma grande mesa no centro, alguidares de barro e mulheres a contar histórias de antigamente). Tive uma infância muito feliz mas bastante urbana e muitas vezes tenho estes desejos de ruralidade. Outra coisa que também me passou pela cabeça foi que giro giro seria se houvesse workshops de doçaria tradicional nos conventos — claro que o Tiago fartou-se de gozar comigo e disse logo que os votos de silêncio das freiras dificultariam a aprendizagem…
Enfim, voltando à marmelada: muitas de vocês disseram que a cor escura vai-se desenvolvendo com o tempo de cozedura, o que faz todo o sentido. Achei graça ao facto de a Andreia ter falado na avó dela com os braços envoltos em panos para evitar as queimaduras — eu fiz exactamente o mesmo! Uma colher de pau muito comprida também ajuda… é que a marmelada a certa altura transforma-se num verdadeiro vulcão e salpica cospe com muita fúria. 
Em relação às formas: usei formas antigas de gelatina (de vidro e faiança) que fui encontrando nas lojas de caridade inglesas. Para desenformar a marmelada, esperei duas ou três semanas para que endurecesse um bocado, depois mergulhei as formas em água muito quente e passei cuidadosamente com uma faca entre a marmelada e a forma. Desenformei-as todas só para a fotografia — depois voltei a pô-las nas formas e tapei-as com papel vegetal, para que se conservem durante uns meses dentro da despensa.
Cores à parte, o gosto é óptimo. Não demasiado doce e granulosa q.b. Mas não sei se será tão boa como as marmeladas das vossas avós…
(em relação a ter sido feita em Março e não em Setembro/Outubro, a explicação é simples… é que cá as estações do ano são ao contrário e o Outono começou agora)
I’m loving all your comments about quince paste, thank you! It’s amazing how simple things like marmelada resonate so much with us and evoque such precious memories. It’s precisely because of this that I enjoy sharing my little things with you!

Unfortunately I have no memories of quince paste being made during my childhood. One of my dreams is one day to be in a large old kitchen surronded by women making preserves and telling stories of the olden days. I was lucky enough to have had a very happy childhood but it was quite an urban one, and sometimes I have these deep wishes for rurality. Another thing that has crossed my mind is that convents could perhaps run traditional cookery workshops, how great would that be? Of course Tiago thought I was crazy and mention the fact that the nuns’ vows of silence might get in the way… 

Anyway, getting back to quince paste: many of you have said that the dark colour develops as the paste boils on the stove, which makes total sense. It’s funny that Andreia should mention her grandmother stirring away with her arms covered in tea towels in order to avoid burns — I did exactly the same thing! A very long wooden spoon works as well… when the paste comes to the boil it resembles a furious volcano. 

About the moulds: I used vintage jelly moulds (glass and earthenware) that I bought in English charity shops. After making the paste I waited for a couple of weeks so that it would go hard and then when it came to turning it out of the jelly moulds, I dipped the moulds in very hot water and then carefully ran a knife around the rim to release it a bit. After taking the pictures I put the individual quince pastes back in their moulds and covered them with greaseproof paper so that they’ll keep in the pantry for a few months. 

Regardless of colours, the taste is great. Not too sweet and just a little bit grainy. Is it as good as your granny’s? I have no idea…

(photos: 1, 2- Constança Cabral; 3- Tiago Cabral)